
I didn’t grow up eating real Belgian waffles. I grew up eating the frozen kind you pop in a toaster and call it a day.
Then I actually made them from scratch, and honestly, I felt a little betrayed by my childhood.
These waffles are deep, crispy on the outside, pillowy soft on the inside, and they smell like a bakery took over your kitchen. And they only take about 10 minutes of actual hands-on work.
I make a batch almost every Sunday now. My husband Silas calls it “waffle church.” 🧇
Here’s exactly how I make them.
Recipe at a Glance
| Detail | Info |
|---|---|
| Prep Time | 10 minutes |
| Cook Time | 20 minutes |
| Total Time | 30 minutes |
| Servings | 4 (makes about 6 waffles) |
| Difficulty | Easy |
| Best For | Weekend breakfast, brunch, freezer meal prep |
Why These Waffles Actually Work
Most waffle recipes skip one step that changes everything: separating the eggs.
Whipping the egg whites separately and folding them in gives you that light, almost fluffy interior with a shatter-crisp outside. Skip it, and you get a flat, dense waffle. Not the end of the world, but not what we’re going for here.
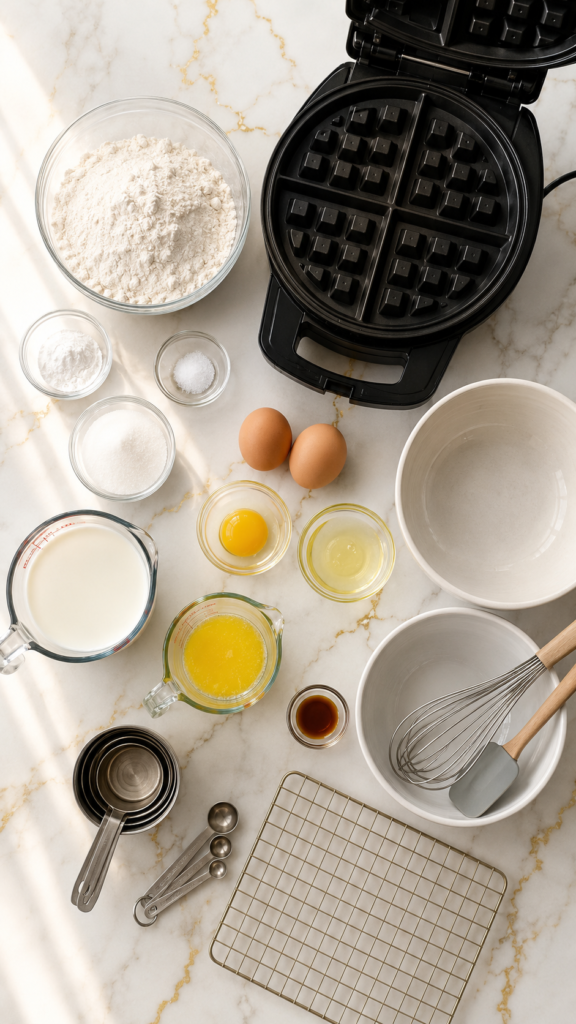
What You’ll Need
- 2 cups all-purpose flour
- 1 tablespoon baking powder
- 1/2 teaspoon salt
- 2 tablespoons granulated sugar
- 2 large eggs, separated
- 1 3/4 cups whole milk
- 1/2 cup unsalted butter, melted
- 1 teaspoon vanilla extract
That’s it. No weird ingredients, no trip to a specialty store.
Tools You’ll Need
- A Belgian waffle maker (deep pockets, not the flat kind)
- Two mixing bowls
- A whisk
- A rubber spatula
- Measuring cups and spoons
- Cooling rack (this one’s small but it matters, more on that below)
How to Make Belgian Waffles
- Preheat your waffle maker according to the manufacturer’s instructions.
- In a large bowl, whisk together the flour, baking powder, salt, and sugar.
- In a separate bowl, whisk the egg yolks, milk, melted butter, and vanilla extract.
- Pour the wet ingredients into the dry ingredients and stir until just combined. A few lumps are fine.
- In a clean bowl, beat the egg whites until soft peaks form.
- Gently fold the egg whites into the batter. Don’t stir hard, just fold until you don’t see big white streaks.
- Lightly grease your waffle maker, even if it’s non-stick.
- Pour the batter in (check your machine’s manual for the right amount) and cook until golden and crisp, usually 4-5 minutes.
- Transfer to a cooling rack or oven rack to keep the crispiness while you cook the rest.
- Serve hot with your toppings of choice.
Pro Tips
1. Don’t overmix the batter. A few lumps are fine. Overmixing activates the gluten and makes your waffles tough instead of light.
2. Preheat your waffle maker fully before adding batter. If it’s not hot enough, your waffles will stick and won’t get that golden color.
3. Resist opening the waffle maker early. I know it’s tempting. But opening it too soon rips the waffle in half. Wait for the steam to slow down, that’s your sign it’s ready.
4. Use melted butter, not oil. Butter gives you that rich flavor and helps with the crispy edges. Oil just doesn’t do the same thing.
5. Keep finished waffles warm in the oven. Set your oven to 200°F and place cooked waffles directly on the oven rack (not stacked on a plate) while you finish the rest. This keeps them crisp instead of soggy.
Substitutions and Variations
- Gluten-free: swap the all-purpose flour for a 1:1 gluten-free baking blend
- Dairy-free: use oat milk and dairy-free butter, both work great here
- Extra crispy: add 1 tablespoon of cornstarch to the dry ingredients
- Savory twist: cut the sugar in half and add 1/2 cup shredded cheddar plus chopped chives
- Chocolate chip waffles: fold in 1/2 cup mini chocolate chips right before cooking
Make-Ahead Tips
You can mix the dry ingredients the night before and store them in an airtight container on the counter.
You can also make the full batter up to 12 hours ahead and keep it covered in the fridge. Just give it a quick stir before using since it’ll separate a bit.
Leftovers and Storage
These waffles freeze beautifully, which honestly might be the most useful thing about this recipe.
- Fridge: store in an airtight container for up to 3 days
- Freezer: lay waffles flat on a baking sheet to freeze individually, then transfer to a freezer bag for up to 2 months
- Reheating: pop frozen or fridge waffles straight into a toaster or toaster oven. Skip the microwave, it makes them soft instead of crispy.
FAQ
Can I make these without separating the eggs?
You can, but the texture won’t be as light. It’s an extra step, but it’s worth it.
Why is my waffle maker smoking?
This usually means there’s too much oil or butter on the plates. A light coating is all you need.
Can I use a regular waffle maker instead of a Belgian one?
Yes, but you’ll want to fill it a little less since regular waffle makers have shallower pockets.
Why are my waffles soggy instead of crispy?
Stacking them on a plate while they cool traps steam. Use a cooling rack or your oven rack instead.
Can I double this recipe?
Yes, and I’d recommend it. These disappear fast.
Wrapping Up
Homemade Belgian waffles are one of those recipes that feels fancy but takes almost no effort once you’ve made them once.
Once you taste the difference between this and the frozen kind, there’s no going back.
Make a batch this weekend. Then come back and tell me in the comments how they turned out, or ask me anything if you get stuck along the way.




