I used to think eclairs were one of those bakery-only treats. Like, sure, I could maybe pull off cookies, but a glossy chocolate pastry filled with silky cream? That felt like a whole different skill level.
Then I actually made a batch at home and honestly, I felt a little betrayed by how simple it was.
Choux pastry sounds fancy and French and intimidating. It’s really just water, butter, flour, and eggs, cooked in one pot. No mixer required for that part. No yeast. No waiting around for dough to rise.
By the end of this post, you’ll know exactly how to pipe, bake, fill, and glaze a batch of eclairs that look like they came from a Parisian pastry case. Let’s get into it.
Recipe At a Glance
| Detail | Info |
|---|---|
| Prep Time | 45 minutes |
| Cook Time | 35 minutes |
| Chill Time | 2 hours |
| Total Time | About 3.5 hours |
| Yield | 12 eclairs |
| Difficulty | Medium |
What You’ll Need
For the Choux Pastry
- 1 cup water
- ½ cup unsalted butter, cubed
- 1 tablespoon sugar
- ¼ teaspoon salt
- 1 cup all-purpose flour
- 4 large eggs, room temperature
For the Pastry Cream
- 2 cups whole milk
- 1 vanilla bean (or 1 tablespoon vanilla extract)
- 4 large egg yolks
- ½ cup granulated sugar
- ¼ cup cornstarch
- 2 tablespoons unsalted butter
For the Chocolate Glaze
- 6 ounces semisweet chocolate, chopped
- ½ cup heavy cream
- 1 tablespoon corn syrup (optional, but it makes the glaze shiny)
Tools You’ll Need
- Medium saucepan
- Wooden spoon or silicone spatula
- Stand mixer or hand mixer
- Piping bag fitted with a large round or French star tip
- Baking sheet
- Parchment paper
- Whisk
- Fine mesh strainer
- Offset spatula or small spoon (for glazing)
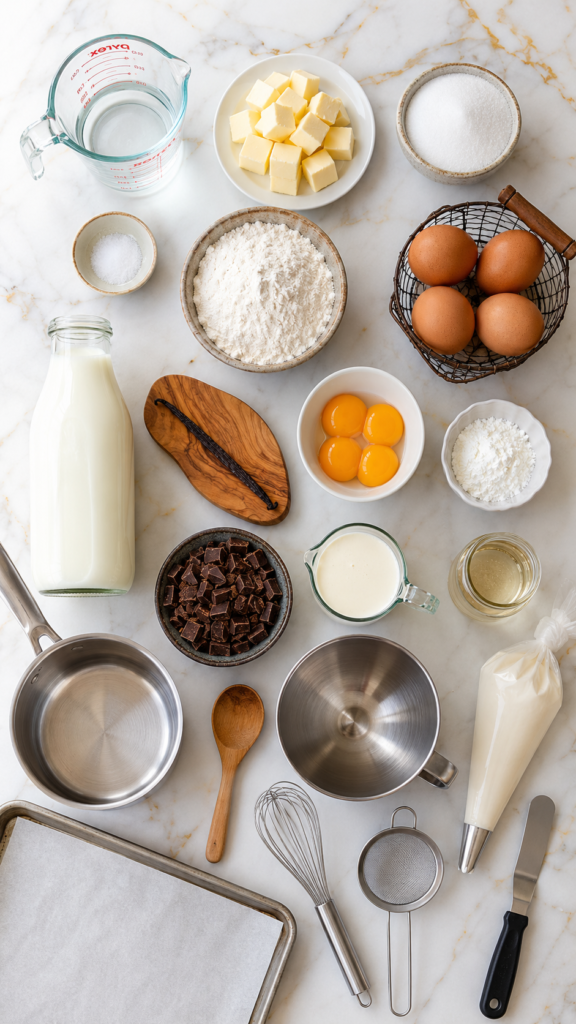
How to Make Classic Chocolate Eclairs
Step 1: Make the Choux Pastry
Add the water, butter, sugar, and salt to a saucepan over medium heat.
Once the butter has fully melted and the mixture starts a rolling boil, pull it off the heat.
Dump in the flour all at once and stir like your life depends on it. You want a smooth dough that pulls away from the sides of the pan.
Put the pan back on low heat for about 1-2 minutes, stirring the whole time. This dries out the dough a bit, which matters more than you’d think.
Transfer the dough to a mixing bowl and let it cool for 5 minutes. This step is easy to skip. Don’t skip it. Adding eggs to hot dough basically scrambles them.
Beat in the eggs one at a time, fully incorporating each one before adding the next. The dough will look broken and weird after the first egg. Keep going. It comes together.
You’ll know it’s ready when the dough falls off the spoon in a slow, thick ribbon.
Step 2: Pipe and Bake
Preheat your oven to 425°F.
Line a baking sheet with parchment paper and transfer your dough to a piping bag fitted with a large round tip.
Pipe lines about 4-5 inches long, leaving space between each one since they puff up quite a bit.
Bake at 425°F for 15 minutes, then lower the temperature to 350°F without opening the oven door, and bake for another 15-20 minutes until deeply golden.
That oven door thing matters more than people realize. Open it too early and your eclairs will collapse into sad little pancakes.
Once baked, poke a small hole in the end of each eclair to let steam escape, then let them cool completely on a wire rack.
Step 3: Make the Pastry Cream
Heat the milk and vanilla bean (or extract) in a saucepan until it just starts to steam. Don’t let it boil.
While that’s heating, whisk the egg yolks, sugar, and cornstarch together in a bowl until pale and smooth.
Slowly pour the hot milk into the egg mixture while whisking constantly. This keeps the eggs from turning into scrambled eggs, which nobody wants in their dessert filling.
Pour everything back into the saucepan and cook over medium heat, whisking nonstop, until it thickens into a pudding-like consistency. This usually takes 3-5 minutes.
Remove from heat, stir in the butter, then strain through a fine mesh sieve into a clean bowl.
Press plastic wrap directly onto the surface of the cream (this stops that weird skin from forming) and refrigerate for at least 2 hours.
Step 4: Make the Chocolate Glaze
Heat the heavy cream until it’s just about to simmer, then pour it over the chopped chocolate in a heatproof bowl.
Let it sit for 2 minutes without touching it, then stir until completely smooth.
Stir in the corn syrup if you’re using it.
Step 5: Assemble
Once your pastry cream is fully chilled, give it a good whisk to loosen it up.
Fit a piping bag with a small round tip and pipe the cream into each eclair through the holes you poked earlier. You’ll feel them get noticeably heavier once they’re filled.
Dip the top of each eclair into the chocolate glaze, twist slightly, and let the excess drip off before setting it back on the rack.
Let the glaze set for about 10 minutes before serving.
Pro Tips
- Weigh your flour if you can. A cup of flour can vary by up to 20% depending on how it’s scooped, and choux pastry is sensitive enough that this actually throws off the texture.
- Add the eggs gradually, even within each egg. If your dough looks too loose after adding an egg, stop. You may not need the full 4 eggs, especially in humid climates.
- Pipe on a slight diagonal, not straight down. This helps you get an even, consistent shape instead of lumpy starts and stops.
- Bake one tray at a time. Eclairs need consistent heat to puff properly, and a second tray throws off your oven’s airflow.
- Don’t glaze warm eclairs. The chocolate will slide right off instead of setting into that glossy shell.
Substitutions and Variations
- Gluten-free: Swap the all-purpose flour for a 1:1 gluten-free baking blend. The texture will be slightly denser, but it still works.
- Dairy-free: Use plant-based butter and a full-fat oat or coconut milk for the pastry cream. Coconut milk will add a subtle coconut flavor, which honestly pairs really nicely with chocolate.
- Flavor swaps: Try coffee-infused pastry cream, a lemon curd filling, or a salted caramel glaze instead of chocolate.
- Craquelin topping: Add a thin disc of sugar-butter dough on top before baking for a crackly, almond-cookie-like crust. It’s an extra step, but it’s a genuine showstopper.
Make-Ahead Tips
- Choux shells can be baked up to 2 days ahead. Store them uncovered at room temperature so they stay crisp, then re-crisp in a 300°F oven for 5 minutes before filling.
- Pastry cream keeps well in the fridge for up to 3 days, tightly covered.
- Chocolate glaze can be made a day ahead. Just warm it gently before using so it’s pourable again.
Assembly is really the only part you want to do same-day. Filled eclairs get soft fast.
Storage and Leftovers
Filled and glazed eclairs are best eaten within 24 hours, but they’ll keep in an airtight container in the fridge for up to 2 days.
The shells will soften over time since the cream releases moisture into the pastry. That’s just the nature of eclairs, not a sign you did anything wrong.
Unfilled shells freeze beautifully for up to a month. Thaw at room temperature, then re-crisp in the oven before filling.
FAQ
Why did my eclairs deflate after baking?
This usually means they came out of the oven too early, or the oven door was opened during the first 15 minutes of baking. Poking a hole for steam to escape right after baking also helps prevent this.
Can I make eclairs without a piping bag?
You can use a zip-top bag with the corner snipped off in a pinch, though a proper piping tip gives you a cleaner, more even shape.
Why is my choux pastry too runny?
It likely needs another minute or two of drying on the stove before you add the eggs, or you added too many eggs too quickly.
Can I use store-bought pudding instead of pastry cream?
You can, though it won’t have the same rich, custardy texture. If you’re short on time, it’s a fair trade-off.
Do eclairs need to be refrigerated?
Yes, once filled with pastry cream, they need to stay refrigerated since the cream is dairy and egg-based.
Wrapping Up
Eclairs have a reputation for being this untouchable French pastry, but once you’ve made a batch, you’ll realize it’s really just a handful of simple techniques stacked together.
Give this recipe a shot this week and let me know how it goes in the comments below. I’d love to hear what flavor variation you try first, and if you run into any hiccups along the way, ask away. I’m happy to help troubleshoot.




