
I made a batch of these on a random Tuesday and my husband ate four before I’d even finished cleaning the kitchen.
That’s basically the whole review right there.
Mini pizza buns are exactly what they sound like: soft little dough balls stuffed with cheese, sauce, and whatever toppings you’re craving, baked until golden and just slightly crispy on the outside.
They’re pizza. Just smaller, softer, and somehow more addictive.
I first made these for a game night when I didn’t want to deal with rolling out an actual pizza crust. One batch later, they became a permanent thing in our house. My husband now requests them the way some people request their favorite restaurant order.
Here’s everything you need to make your own.
Recipe at a Glance
| Detail | Info |
|---|---|
| Prep Time | 20 minutes |
| Rise Time | 45 minutes |
| Bake Time | 15 minutes |
| Total Time | About 1 hour 20 minutes |
| Yield | 12 buns |
| Difficulty | Easy |
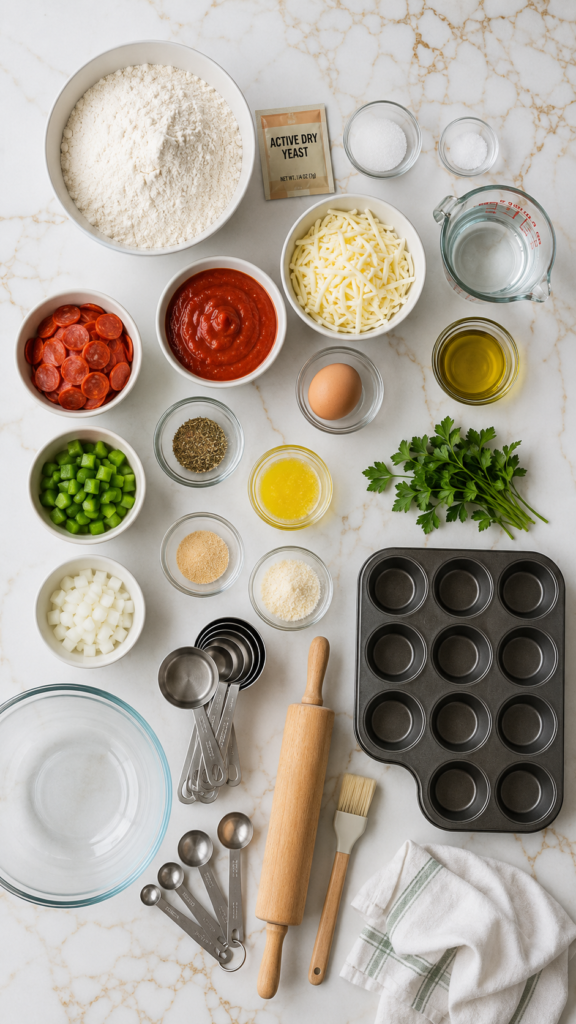
What You’ll Need
For the dough:
- 3 cups all-purpose flour
- 1 packet (2¼ tsp) active dry yeast
- 1 tsp sugar
- 1 tsp salt
- 1 cup warm water (about 110°F)
- 2 tbsp olive oil
For the filling:
- ½ cup pizza sauce
- 1½ cups shredded mozzarella
- ½ cup mini pepperoni (or diced regular pepperoni)
- ¼ cup diced bell pepper (optional)
- ¼ cup diced onion (optional)
- ½ tsp Italian seasoning
For topping:
- 1 egg (for egg wash)
- 2 tbsp melted butter
- 1 tsp garlic powder
- 2 tbsp grated parmesan
- Fresh parsley, chopped
Tools You’ll Need
- Large mixing bowl
- Measuring cups and spoons
- Rolling pin (or just your hands)
- Muffin tin or baking sheet
- Pastry brush
- Kitchen towel (for covering the dough while it rises)
How to Make Mini Pizza Buns
Step 1: Make the Dough
Warm your water to about 110°F. Too hot and it’ll kill the yeast. Too cold and it won’t activate.
Mix the warm water, sugar, and yeast in a small bowl. Let it sit for 5-10 minutes until it gets foamy on top.
If it doesn’t foam, your yeast is dead. Toss it and grab a fresh packet.
In a large bowl, combine the flour and salt. Add the yeast mixture and olive oil.
Mix until a shaggy dough forms, then knead for about 8 minutes until smooth and elastic.
Step 2: Let It Rise
Place the dough in a lightly oiled bowl. Cover with a towel.
Let it rise somewhere warm for about 45 minutes, or until doubled in size.
Quick tip: Your oven with just the light on makes a surprisingly perfect proofing spot.
Step 3: Prep Your Filling
While the dough rises, mix your shredded mozzarella with the Italian seasoning.
Dice up any extra toppings you’re using.
Have your pizza sauce ready to go so assembly moves fast.
Step 4: Assemble the Buns
Punch down the risen dough and divide it into 12 equal pieces.
Flatten each piece into a small disc, about 4 inches wide.
Spoon about 1 tablespoon of pizza sauce into the center, then add cheese and your chosen toppings.
Don’t overfill. It’ll leak out during baking and you’ll end up with a mess instead of a bun.
Pull the edges of the dough up and around the filling, pinching tightly to seal.
Place seam-side down into a greased muffin tin or onto a baking sheet.
Step 5: Add the Finishing Touch
Brush each bun with the egg wash.
Sprinkle with garlic powder and parmesan.
Let them rest for 10 more minutes while your oven preheats to 375°F.
Step 6: Bake
Bake for 15-18 minutes, until golden brown on top.
Brush with melted butter the second they come out of the oven. This step matters more than you’d think.
Top with fresh parsley and let cool for 5 minutes before serving.
Pro Tips
1. Seal the dough like you mean it. A weak seal is the #1 reason people end up with cheese lava all over their baking sheet. Pinch it, twist it, press it down. Make sure there’s no gap.
2. Don’t skip the resting time before baking. Those extra 10 minutes let the dough relax and puff up properly instead of baking dense.
3. Room temperature cheese melts better. Cold cheese straight from the fridge takes longer to melt evenly, which can leave your buns doughy in the middle.
4. Use a muffin tin for extra insurance. If you’re nervous about leaks, a muffin tin holds everything in place way better than a flat baking sheet.
5. Brush with butter immediately after baking. This is what gives them that shiny, bakery-style finish. Skip it and they’ll look flat in comparison.
Substitutions and Variations
You can make these your own pretty easily. Here’s what works:
- Gluten-free: Swap the all-purpose flour for a 1:1 gluten-free baking blend
- Vegetarian: Skip the pepperoni, add mushrooms, spinach, or olives instead
- Spicy version: Add red pepper flakes to the sauce or use spicy pepperoni
- BBQ chicken buns: Swap pizza sauce for BBQ sauce and add shredded chicken
- Dairy-free: Use a dairy-free mozzarella shred (the meltier brands work best here)
Make-Ahead Tips
You can prep the dough up to a day in advance. Just let it rise in the fridge overnight instead of on the counter.
Pull it out about 30 minutes before you plan to assemble so it comes back to room temperature.
You can also fully assemble the buns and freeze them unbaked. Bake straight from frozen, just add an extra 5-7 minutes to the bake time.
Leftovers and Storage
These keep well in the fridge for up to 4 days in an airtight container.
To reheat, pop them in a 350°F oven for about 8 minutes. This brings back the crispy exterior way better than the microwave does.
They also freeze beautifully once baked. Just thaw overnight in the fridge before reheating.
FAQ
Can I use store-bought pizza dough instead of making my own? Yes. It’ll save you time and still tastes great. Just let it come to room temperature first so it’s easier to work with.
Why did my buns leak filling everywhere? This almost always comes down to overfilling or a weak seal. Less filling and a tighter pinch will fix it next time.
Can I make these ahead for a party? Definitely. Bake them the morning of, then reheat right before guests arrive so they taste fresh.
What dipping sauce goes best with these? Marinara is the classic pairing, but ranch and garlic butter both work surprisingly well too.
Can kids help make these? Yes, and they usually love it. The assembly step is basically stuffing and pinching dough, which is a pretty fun task for little hands.
Wrapping Up
Mini pizza buns are one of those recipes that seem simple on paper but somehow turn into the thing everyone remembers from the party.
They’re easy enough for a weeknight and impressive enough for guests, which is a rare combination.
Give them a try this week and let me know how they turn out in the comments below. I’d love to hear what toppings you used and whether they disappeared as fast as mine did.




