
I made my first homemade pizza expecting a sad, soggy disappointment.
What came out of my oven instead had a crust so good my husband asked if I’d secretly ordered from a real pizzeria.
That was the night I stopped ordering pizza for delivery. 🍕
Here’s the thing nobody tells you: real Italian pizza isn’t about piling on toppings. It’s about three or four good ingredients treated with a little patience.
That’s it. That’s the whole secret.
I picked this up after way too many trips to Italy (and way too many burnt first attempts at home). Below is the exact method I use now, no fancy equipment required.
Recipe At A Glance
| Detail | Info |
|---|---|
| Prep time | 20 minutes (plus 1-24 hours for dough rest) |
| Cook time | 10-15 minutes |
| Total time | About 90 minutes active, longer if you let the dough rest overnight |
| Yield | 2 large pizzas (serves 4) |
| Difficulty | Easy, but needs patience |
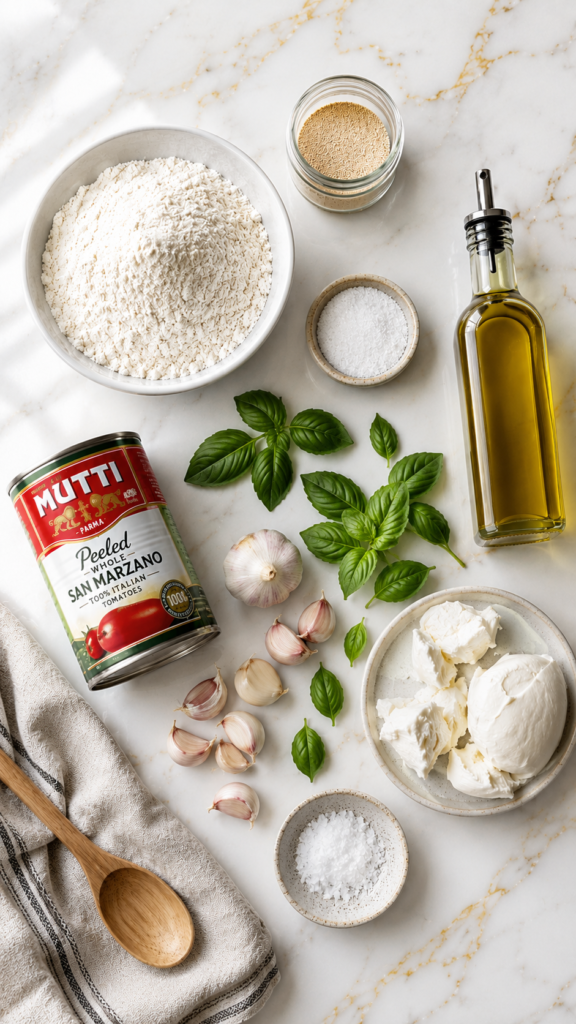
What You’ll Need
For the dough
- 500g bread flour (or all-purpose in a pinch)
- 325ml warm water
- 7g active dry yeast
- 2 tsp salt
- 1 tbsp olive oil, plus more for the bowl
For the sauce
- 1 can (400g) whole San Marzano tomatoes
- 1 garlic clove
- 1 tsp salt
- A drizzle of olive oil
- A few fresh basil leaves (optional but so worth it)
For the toppings
- Fresh mozzarella, torn into pieces (about 250g)
- Fresh basil leaves
- Extra virgin olive oil for drizzling
- Flaky salt
That’s genuinely it. No fifteen-ingredient list here.
Tools You’ll Need
- A large mixing bowl
- A pizza stone or steel (a heavy baking sheet works too)
- A pizza peel, or a flat baking sheet with no rim
- Parchment paper (makes transferring the dough way less stressful)
- A blender or food mill for the sauce
How To Make It
Step 1: Make the dough
Dissolve the yeast in the warm water and let it sit for 5 minutes until it looks foamy.
If it doesn’t foam, your yeast is dead. Toss it and grab a fresh packet.
Mix the flour and salt in your bowl. Pour in the yeast water and olive oil, then mix until a shaggy dough forms.
Knead for about 8-10 minutes, until it’s smooth and springs back when you poke it.
Step 2: Let it rest
Place the dough in an oiled bowl, cover it, and let it rise somewhere warm for 1-2 hours, or until doubled.
Want next-level flavor? Pop it in the fridge overnight instead. Cold, slow fermentation is the difference between “fine pizza” and “wait, did you make this?”
Step 3: Make the sauce
Blend the tomatoes, garlic, and salt together until smooth but still a little chunky.
Skip cooking it. Real Neapolitan-style sauce goes on raw and cooks right on the pizza.
Step 4: Shape the dough
Divide the dough into two balls. Let them rest for 15-20 minutes so the gluten relaxes.
Press and stretch each ball into a round shape using your hands, working from the center out. Leave the outer edge a bit thicker for that classic puffy crust.
Don’t use a rolling pin. It crushes all the air bubbles you worked so hard to build.
Step 5: Preheat like your pizza depends on it (because it does)
Put your pizza stone or steel in the oven and crank it to the highest temperature it goes, usually 500-550°F.
Let it heat for at least 45 minutes. This part feels excessive. It isn’t.
Step 6: Top and bake
Spread a thin layer of sauce, leaving the edges bare. Add torn mozzarella pieces.
Slide the pizza onto the hot stone using your peel or parchment paper.
Bake for 8-12 minutes, until the crust is charred in spots and the cheese is bubbling.
Add fresh basil and a drizzle of olive oil right when it comes out.
Pro Tips
- Weigh your ingredients if you can. Cups are inconsistent, and pizza dough is unforgiving about ratios.
- Don’t overload the toppings. A soggy center is almost always caused by too much sauce or cheese.
- Use parchment paper for your first few tries. Sliding raw dough off a peel takes practice, and nobody needs a pizza-shaped disaster on their oven floor.
- Let the dough come to room temperature before shaping, even if it’s been in the fridge. Cold dough fights back.
- Rotate the pizza halfway through baking if your oven has hot spots. Most home ovens do.
Substitutions And Variations
- No bread flour? All-purpose flour works, though the crust will be slightly less chewy.
- Dairy-free? Swap mozzarella for a plant-based version, or go the marinara route with no cheese at all.
- Gluten-free? A store-bought gluten-free pizza dough mix will get you close, though the texture won’t fully match.
- Toppings: try prosciutto after baking, roasted garlic, caramelized onions, or a hit of chili oil.
- No pizza stone? A cast iron skillet flipped upside down in the oven works surprisingly well.
Make-Ahead Tips
The dough can be made up to 3 days ahead and kept in the fridge, covered.
You can also freeze portioned dough balls for up to 3 months. Just thaw overnight in the fridge before using.
The sauce keeps in the fridge for about 5 days, so doubling that batch is never a bad idea.
Leftovers And Storage
Leftover pizza keeps in the fridge for up to 4 days, wrapped or in an airtight container.
Skip the microwave. It turns the crust rubbery and sad.
Instead, reheat in a skillet over medium heat for a few minutes, or in a 375°F oven for about 8 minutes. Both bring the crust back to life.
FAQ
Why is my dough not rising?
Your yeast is likely old, or your water was too hot and killed it. Water should feel like warm bathwater, not hot.
Can I make this without a stand mixer?
Yes. This dough is fully hand-kneadable, and honestly, I prefer it that way.
Why does my crust turn out soggy in the middle?
Too much sauce, too much cheese, or an oven that isn’t hot enough. All three are easy fixes.
Do I really need a pizza stone?
It helps a lot, but a heavy overturned baking sheet preheated in the oven gets you most of the way there.
Can kids help with this recipe?
Shaping the dough is a genuinely fun task for kids, and there’s very little that can go wrong.
Wrapping Up
Homemade pizza sounds intimidating until you actually make it once. After that, it’s just a Friday night thing.
Give this one a try, and don’t stress about it looking “perfect.” Some of the best pizzas I’ve made have been a little lopsided.
Drop a comment below and let me know how yours turned out, or ask away if anything trips you up along the way. 🙂




