
Here’s something nobody tells you about croissants: the dough doesn’t actually take skill. It takes patience.
That’s it. That’s the secret.
I used to think laminated dough was something only French-trained bakers could pull off. Then I made a batch on a random Tuesday with zero formal training, a rolling pin, and a very cold stick of butter. They came out flaky, chocolatey, and honestly better than the ones from the bakery down my street.
So if you’ve been putting this off because it “seems intimidating,” let this be your sign. 🥐
Grab your butter. Let’s get into it.
Recipe At a Glance
| Detail | Info |
|---|---|
| Prep Time | 45 minutes (plus resting) |
| Chill/Rest Time | 4 hours (or overnight) |
| Bake Time | 18-20 minutes |
| Total Time | About 5 hours, mostly hands-off |
| Yield | 8 croissants |
| Difficulty | Medium (it’s mostly waiting, not skill) |
What You’ll Need
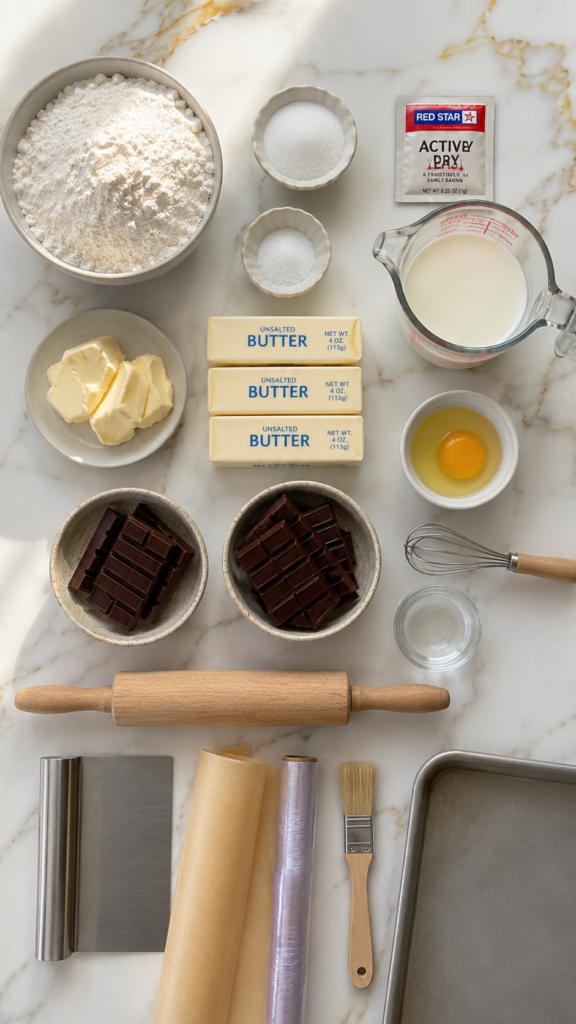
For the dough:
- 4 cups all-purpose flour
- 1/4 cup granulated sugar
- 2 1/4 tsp active dry yeast (one packet)
- 1 1/2 tsp salt
- 1 1/4 cups whole milk, warm
- 3 tbsp unsalted butter, softened
For the butter block:
- 1 1/2 cups (3 sticks) unsalted butter, cold
For the filling and finishing:
- 2 bars (7 oz each) semi-sweet or dark chocolate, broken into batons
- 1 egg, beaten (for egg wash)
- 1 tbsp water
Tools You’ll Need
- Rolling pin
- Stand mixer with dough hook (or your hands and a bowl)
- Parchment paper
- Bench scraper
- Baking sheet
- Plastic wrap
- Pastry brush
How to Make Chocolate Croissants
Step 1: Make the Dough
Warm the milk until it’s just above room temperature. Not hot, just cozy.
Mix the yeast into the warm milk and let it sit for 5 minutes until it looks foamy.
In your stand mixer, combine flour, sugar, and salt. Add the milk mixture and softened butter.
Knead for about 6 minutes until you get a smooth, slightly tacky dough.
Shape it into a rectangle, wrap it in plastic, and chill for 1 hour.
Step 2: Prep the Butter Block
While the dough chills, place your cold butter between two sheets of parchment paper.
Pound and roll it into a flat 7×7 inch square. This part is oddly satisfying.
Pop it in the fridge to firm back up.
Step 3: Laminate the Dough
Roll your chilled dough into a rectangle about twice the size of your butter block.
Place the butter square in the center and fold the dough over it like a letter, sealing the edges.
Roll it out into a long rectangle, then fold it into thirds again (this is called a “turn”).
Wrap and chill for 30 minutes.
Repeat this rolling and folding process three more times, chilling for 30 minutes between each turn.
This is the part that builds all those buttery, flaky layers. Don’t rush it.
Step 4: Shape the Croissants
After your final turn, roll the dough into a large rectangle, about 1/4 inch thick.
Cut it into 8 rectangles (roughly 4×8 inches each).
Place a chocolate baton near one edge, roll partway, add another piece of chocolate, then finish rolling into a log.
Place seam-side down on your baking sheet.
Step 5: Proof and Bake
Cover the shaped croissants loosely and let them proof at room temperature for 1.5 to 2 hours, until visibly puffy.
Preheat your oven to 400°F.
Brush each croissant with egg wash.
Bake for 18-20 minutes until deep golden brown.
Let them cool for at least 10 minutes before you dive in. I know that’s hard.
Pro Tips
1. Keep everything cold, always. The second your butter starts to melt into the dough instead of staying in distinct layers, you lose the flake. Chill between every single step, no shortcuts here.
2. Work fast during rolling. Room temperature butter and warm hands are the enemy of lamination. If your kitchen runs warm, work in shorter bursts and pop the dough back in the fridge often.
3. Use good chocolate. This is not the place to use chocolate chips (they hold their shape too much and won’t melt properly inside). A real chocolate bar makes a noticeable difference.
4. Don’t skip the proof. Underproofed croissants bake up dense and doughy in the middle. They should look almost doubled and jiggle slightly when you nudge the pan.
5. Trust the process, even when it looks messy. Somewhere around turn two, the dough looks like it’s falling apart. It’s not. Keep going.
Substitutions and Variations
- Chocolate hazelnut version: swap the chocolate batons for a spoonful of Nutella
- Almond croissants: skip the chocolate, use almond paste and top with sliced almonds
- Vegan option: use plant-based butter (a European-style, high-fat brand works best) and a milk alternative
- Whole wheat blend: swap up to half the flour for whole wheat, though the texture will be slightly denser
- Mini croissants: cut your dough into 12 smaller rectangles instead of 8 for bite-sized treats
Make-Ahead Tips
You can shape the croissants and refrigerate them overnight before the final proof.
Just pull them out about an hour before baking to let them come up to room temperature and finish proofing.
You can also freeze shaped, unbaked croissants for up to a month. Thaw overnight in the fridge, then proof as usual.
A Few Extra Details
Nutritional ballpark (per croissant): roughly 380-420 calories, 24g fat, 38g carbs, 6g protein. This will shift depending on your chocolate and butter brands.
Pairing suggestions: a strong espresso or cappuccino cuts through the richness perfectly. For breakfast, pair with fresh berries to balance the sweetness.
Time efficiency tip: do your turns and folds the night before, then let the dough sit in the fridge overnight instead of just 30 minutes between turns. Shape and bake fresh the next morning.
Leftovers and Storage
Store leftover croissants in an airtight container at room temperature for up to 2 days.
To refresh them, pop them in a 300°F oven for 5-7 minutes. This brings back the crisp exterior without drying them out.
For longer storage, freeze baked croissants for up to a month. Reheat straight from frozen at 300°F for about 10 minutes.
Skip the microwave. It turns that crisp, flaky exterior into something sad and chewy.
FAQ
Why did my croissants turn out dense instead of flaky? This usually means the butter melted into the dough during rolling, or the dough wasn’t proofed long enough before baking.
Can I use store-bought puff pastry instead? You can, but the texture will be different. Puff pastry is flakier and less bread-like, so it won’t have that classic chewy-yet-flaky croissant bite.
Why do I need to chill the dough so many times? Chilling keeps the butter solid and separate from the dough, which is exactly what creates those thin, distinct layers when it bakes.
Can I make the dough by hand without a stand mixer? Yes. It just takes a bit more elbow grease during kneading. About 10 minutes of hand kneading should get you a similar result.
How do I know when they’re properly proofed? They should look noticeably puffier and jiggle slightly when you gently shake the pan. If they look flat and dense, give them more time.
Wrapping Up
Making chocolate croissants from scratch is one of those things that sounds a lot harder than it actually is.
Once you get the rhythm of rolling, folding, and chilling, it becomes almost meditative.
And there’s nothing quite like pulling a tray of golden, chocolate-filled croissants out of your own oven.
Give this recipe a try this weekend. Then come back and drop a comment letting me know how they turned out, or ask away if you run into any questions along the way. 🍫




