
I didn’t grow up making ice cream. I grew up eating the store-bought kind straight from the carton, standing in front of the freezer at 11pm like a raccoon.
Then I made peach ice cream from scratch for the first time and honestly, it kind of ruined the carton stuff for me. 🍑
The texture is creamier. The peach flavor actually tastes like peaches, not “peach flavoring.” And it takes way less effort than I expected before I tried it myself.
If you’ve got ripe peaches sitting on your counter right now, this is exactly what you should be doing with them.
Recipe At a Glance
| Detail | Info |
|---|---|
| Prep Time | 25 minutes |
| Cook Time | 10 minutes |
| Chill Time | 4+ hours |
| Churn Time | 25-30 minutes |
| Total Time | About 5 hours (mostly hands-off) |
| Yield | About 1.5 quarts |
| Difficulty | Easy |
| Best For | Summer desserts, BBQs, using up ripe peaches |
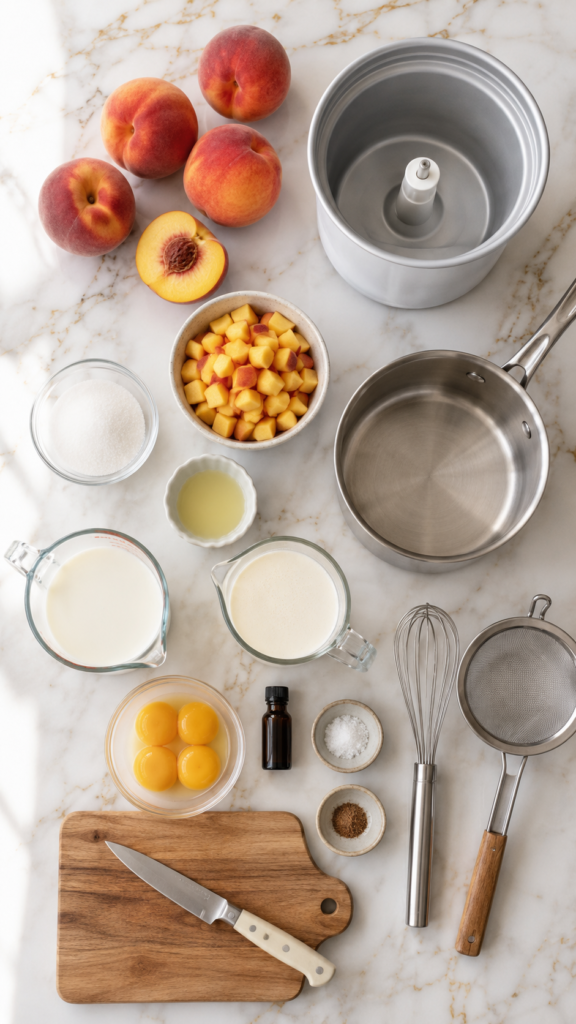
What You’ll Need
For the peach mixture:
- 4 ripe peaches, peeled and diced (about 3 cups)
- 1/3 cup granulated sugar
- 1 tablespoon lemon juice
For the ice cream base:
- 2 cups heavy cream
- 1 cup whole milk
- 2/3 cup granulated sugar
- 4 large egg yolks
- 1 teaspoon vanilla extract
- Pinch of salt
- Pinch of nutmeg (optional, but I like it)
That’s it. Nine ingredients and most of them are already in your kitchen.
Tools You’ll Need
- Ice cream maker (with the bowl pre-frozen, this matters)
- Medium saucepan
- Mixing bowls
- Whisk
- Fine mesh strainer
- Blender or immersion blender
- Freezer-safe container with a lid
- Cutting board and knife
No ice cream maker? Don’t panic. I’ll cover the no-churn method further down.
How to Make Peach Ice Cream
Step 1: Macerate the Peaches
Toss your diced peaches with sugar and lemon juice in a bowl.
Let this sit for 20-30 minutes. The sugar pulls out the peach juices and creates this syrupy, concentrated peach flavor.
Step 2: Make the Custard Base
In your saucepan, warm the cream, milk, half the sugar, and the salt over medium heat. Stir occasionally so nothing scorches.
While that’s warming, whisk your egg yolks with the remaining sugar in a separate bowl until it turns a pale yellow.
Step 3: Temper the Eggs
Slowly pour a small amount of the warm cream mixture into the egg yolks while whisking fast. This brings up the temperature gradually so you don’t end up with scrambled eggs.
Once combined, pour the egg mixture back into the saucepan with the rest of the cream.
Step 4: Cook the Custard
Cook over low heat, stirring constantly, until the mixture thickens enough to coat the back of a spoon. This usually takes 5-8 minutes.
You’ll know it’s ready when you run your finger across the back of the spoon and the line holds.
Step 5: Strain and Chill
Pour the custard through a fine mesh strainer into a clean bowl. Stir in the vanilla and nutmeg.
Cover and refrigerate for at least 4 hours, or overnight if you can plan ahead.
Step 6: Blend Half the Peaches
Once your base is fully chilled, blend about half of your macerated peaches into a smooth puree. Leave the other half diced for texture.
Stir the puree into your chilled custard base.
Step 7: Churn
Pour the mixture into your ice cream maker and churn according to your machine’s instructions, usually 20-25 minutes.
In the last 5 minutes, add in your remaining diced peaches.
Step 8: Freeze
Transfer the ice cream to a freezer-safe container. Press a piece of parchment paper directly on the surface before sealing to prevent ice crystals.
Freeze for at least 4 hours for a firm, scoopable texture.
Pro Tips
1. Use peaches that are almost too ripe. The softer and more fragrant they are, the sweeter and more flavorful your ice cream turns out. Slightly bruised peaches are actually perfect here.
2. Freeze your ice cream maker bowl the night before. This is the step people skip and then wonder why their ice cream never firms up. It needs a full 24 hours in the freezer.
3. Don’t skip straining the custard. Even if you whisk carefully, little bits of cooked egg can sneak in. Straining gives you that silky, no-lumps texture.
4. Let the base chill completely before churning. A warm base won’t churn properly and you’ll end up with more of a peach milkshake than ice cream. Cold, cold, cold.
5. Add the peaches in the last 5 minutes of churning. Toss them in too early and they turn into mush. Toss them in too late and they don’t mix in evenly.
No Ice Cream Maker? Here’s the No-Churn Method
- Whip 2 cups heavy cream to stiff peaks
- Fold in 1 can sweetened condensed milk
- Fold in your peach puree and diced peaches
- Freeze in a loaf pan for 6+ hours
It’s not identical to the churned version, but it’s genuinely good and takes almost no effort.
Substitutions and Variations
- Frozen peaches: Work great when fresh aren’t in season. Thaw and drain excess liquid first.
- Dairy-free: Swap the cream and milk for full-fat coconut milk. The flavor shifts slightly, but it’s still delicious.
- Lower sugar: Cut the sugar by a third. The peaches still bring plenty of natural sweetness.
- Bourbon peach ice cream: Add 1-2 tablespoons of bourbon to the base for an adult version. It also helps keep the texture softer.
- Peach cobbler ice cream: Fold in crumbled graham crackers or shortbread cookies during the last minute of churning.
Make-Ahead Tips
You can make the custard base up to 2 days ahead and keep it covered in the fridge until you’re ready to churn.
The macerated peaches can also be prepped a day in advance. Just keep them covered and refrigerated.
Nutrition, Pairings, and Time-Saving Notes
Rough nutrition per 1/2 cup serving: around 220-260 calories, 16g fat, 20g sugar, 3g protein. This varies depending on how ripe your peaches are and how much sugar you use.
Pairing ideas:
- A slice of warm peach cobbler or crumble
- Shortbread cookies on the side
- A drizzle of honey or caramel on top
- Fresh mint for a little brightness
Time-saving tip: Make the custard base the night before so all you have to do the next day is churn and freeze. This turns a multi-hour process into a 30-minute one.
Leftovers and Storage
Store your ice cream in an airtight, freezer-safe container for up to 2 weeks.
Press parchment paper directly against the surface before sealing the lid. This keeps ice crystals from forming and keeps the texture smooth.
Let it sit at room temperature for 5-10 minutes before scooping if it’s been in the freezer for more than a day. Straight-from-the-freezer ice cream can be rock hard.
FAQ
Can I use canned peaches?
You can, but drain them well first and reduce the added sugar since canned peaches are often packed in syrup.
Why is my ice cream icy instead of creamy?
This usually means the base wasn’t chilled enough before churning, or there’s too much water content from underripe peaches.
Do I need an ice cream maker?
No. The no-churn method above works well if you don’t have one.
Can I make this without eggs?
Yes. Skip the custard step entirely and use the no-churn method with condensed milk instead.
How long does homemade ice cream last?
About 2 weeks for the best texture, though it’s safe to eat for longer if stored properly.
Wrapping Up
This is one of those recipes that looks fancy but is genuinely simple once you’ve done it once.
Grab a few ripe peaches next time you’re at the grocery store or farmers market and give this a try. You’ll probably end up making it every summer after this.
Let me know in the comments how yours turned out, and if you tried any of the variations, I’d love to hear which one you went with.




