
Most onion rings go soggy the second they hit your plate. Mine don’t. And once you see the trick, you’ll wonder why every recipe skips it.
I’ve made onion rings probably fifty different ways over the years. Thin batter, thick batter, beer batter, no batter at all. This version is the one my husband asks for on repeat, and it’s stupid simple once you know the order of operations.
Let’s get into it.
Recipe At a Glance
| Detail | Info |
|---|---|
| Prep Time | 20 minutes |
| Cook Time | 15 minutes |
| Total Time | 35 minutes |
| Servings | 4 |
| Difficulty | Easy |
| Best For | Game day, burger night, “I need a snack right now” |
What You’ll Need
For the onions:
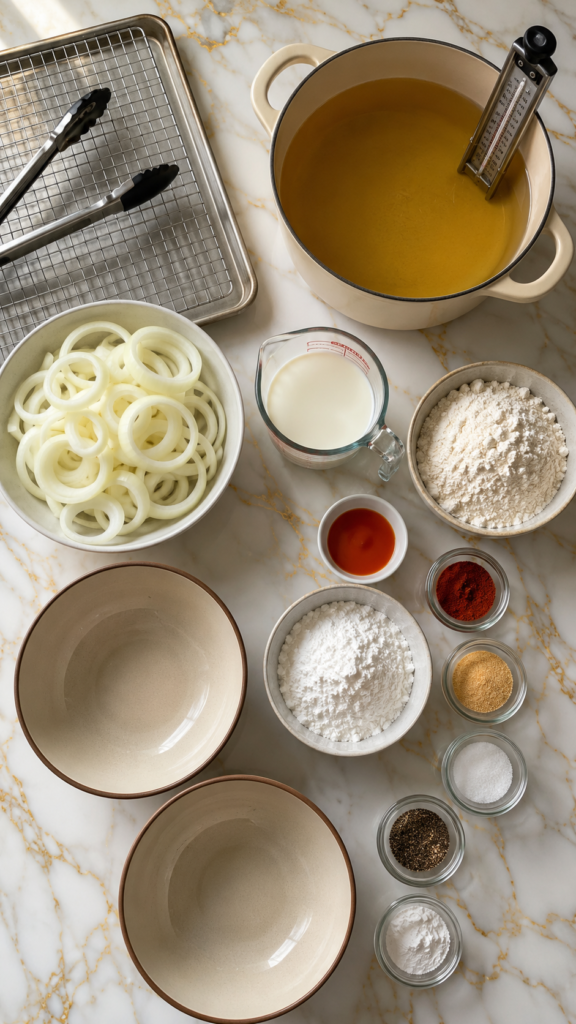
- 2 large yellow onions, sliced into ½-inch rings
- 2 cups buttermilk
- 1 tablespoon hot sauce (optional, but it does something good)
For the dry mix:
- 1 ½ cups all-purpose flour
- 1 cup cornstarch
- 1 tablespoon paprika
- 1 teaspoon garlic powder
- 1 teaspoon salt
- ½ teaspoon black pepper
- ½ teaspoon baking powder
For frying:
- 4 cups vegetable oil (or peanut oil)
That’s it. No 15-ingredient list, no weird pantry hunt.
Tools You’ll Need
- A deep, heavy pot or Dutch oven
- A candy or deep-fry thermometer
- A wire rack set over a baking sheet
- Tongs
- Two large mixing bowls
The wire rack is non-negotiable, by the way. Paper towels trap steam underneath the rings, and steam is exactly what makes them go limp. More on that below.
Why Cornstarch Is the Secret
Flour alone gives you a soft, kind of pale crust. Cornstarch is what makes the coating shatter when you bite into it.
I learned this from a Korean fried chicken chef years ago, and it completely changed how I fry anything. The starch absorbs less oil and crisps up almost glassy. Once I started mixing it into the dredge, I never went back to plain flour.
How To Make It
1. Soak the onions. Slice your onions into rings and separate them. Submerge them in buttermilk (add the hot sauce here if you’re using it). Let them sit for at least 15 minutes, up to overnight in the fridge.
2. Mix the dry coating. In a large bowl, whisk together the flour, cornstarch, paprika, garlic powder, salt, pepper, and baking powder.
3. Heat your oil. Pour the oil into your pot and heat it to 375°F. Don’t eyeball this one. A thermometer genuinely matters here.
4. Dredge the rings. Pull an onion ring straight from the buttermilk (don’t shake off the excess) and drop it into the dry mix. Press the coating on with your fingers so it clumps a little. Those little craggy bits are where the crunch lives.
5. Fry in small batches. Fry 5-6 rings at a time for 2-3 minutes, flipping once, until deep golden brown. Crowding the pot drops the oil temperature and that’s how you end up with greasy, sad rings.
6. Rest on a wire rack. Transfer straight to the wire rack, not paper towels. Sprinkle with salt while they’re still hot.
7. Repeat and serve immediately. Onion rings wait for no one. Eat them within 10 minutes of frying for peak crunch.
Pro Tips
1. Salt them the second they leave the oil. Salt sticks to hot, oily surfaces. Wait too long and it just slides right off.
2. Don’t skip the resting time in the buttermilk. 15 minutes is the minimum, but a few hours mellows the onion’s bite and helps the coating stick better.
3. Keep your oil temp steady. It’ll dip when you add rings. Give it a minute to climb back to 375°F between batches instead of rushing.
4. Use a spider strainer if you have one. It lifts multiple rings out at once without breaking them apart, unlike tongs.
5. Slice your onions thick. Anything under ½ inch tends to overcook before the coating even finishes browning.
Substitutions and Variations
- No buttermilk? Mix 2 cups regular milk with 2 tablespoons lemon juice or white vinegar. Let it sit 5 minutes.
- Gluten-free? Swap the flour for a 1:1 gluten-free blend. The cornstarch stays the same.
- Spicy version: Add cayenne to the dry mix, or double the hot sauce in the soak.
- Air fryer version: Spray coated rings with oil and cook at 400°F for 10-12 minutes, flipping halfway. Won’t be quite as crisp, but it’s close.
- Beer batter swap: Replace the buttermilk soak with a wet batter made from flour, cornstarch, and cold beer for a puffier, pub-style ring.
Make-Ahead Tips
You can prep two things in advance:
- Slice and soak the onions up to 24 hours ahead, covered in the fridge.
- Mix the dry coating and store it in an airtight container for up to a week.
What you shouldn’t do ahead of time is fry them. Fried onion rings really do need to be a last-minute step.
Nutrition and Pairing Notes
One serving (about 6-7 rings) runs roughly 310 calories, 8g fat, 52g carbs, and 5g protein. That’ll shift depending on how much oil clings to your batch.
These pair especially well with:
- A smash burger and a cold drink
- BBQ ribs, as a stand-in for fries
- A simple ranch or spicy aioli for dipping
Leftovers and Storage
Onion rings are at their absolute best fresh, but leftovers aren’t a lost cause.
- Fridge: Store in an airtight container for up to 2 days.
- Reheat: Skip the microwave. It turns them into rubber. Instead, reheat in a 400°F oven or air fryer for 5-6 minutes to bring the crunch back.
- Freezer: Freeze cooked, cooled rings in a single layer, then transfer to a bag. Reheat straight from frozen at 400°F for about 10 minutes.
FAQ
Why did my onion rings turn out soggy?
Usually one of two things: the oil wasn’t hot enough, or they were left to sit on paper towels instead of a wire rack.
Can I use a different onion?
Yellow onions give the best balance of sweetness and bite. Red onions work too, but they’re sharper and the color bleeds into the coating slightly.
What oil is best for frying onion rings?
Something neutral with a high smoke point. Vegetable, canola, or peanut oil all work well.
Do I need a deep fryer?
No. A heavy pot with 2-3 inches of oil does the job just as well.
Can I make these without buttermilk entirely?
Yes. Plain milk with a splash of vinegar mimics buttermilk’s acidity closely enough for this recipe.
Wrapping Up
Crispy onion rings are one of those snacks that feel fancy but take almost no real effort once you’ve got the process down.
Slice, soak, dredge, fry, rest. That’s the whole game.
Give this one a try this weekend and let me know how it goes in the comments. Did the cornstarch trick make a difference for you? I’d love to hear it, and if you’ve got a variation you swear by, drop that too.




