
I used to think soft pretzels were a “buy them at the mall” kind of food.
Then I made a batch at home and realized I’d been wasting money for years.
The chewy inside, the dark golden crust, that little hit of salt in every bite. It’s all doable in your own kitchen, and honestly, it’s easier than you’d think.
There’s one weird ingredient that makes all the difference (I’ll get to that in a second), and once you know the trick, you’ll never look at store pretzels the same way again. 🥨
Let’s get into it.
Recipe at a Glance
| Detail | Info |
|---|---|
| Prep time | 20 minutes |
| Rise time | 1 hour |
| Cook time | 12-15 minutes |
| Total time | About 1 hour 40 minutes |
| Yield | 8 large pretzels |
| Difficulty | Beginner-friendly |
| Best for | Game day, after-school snacks, showing off a little |
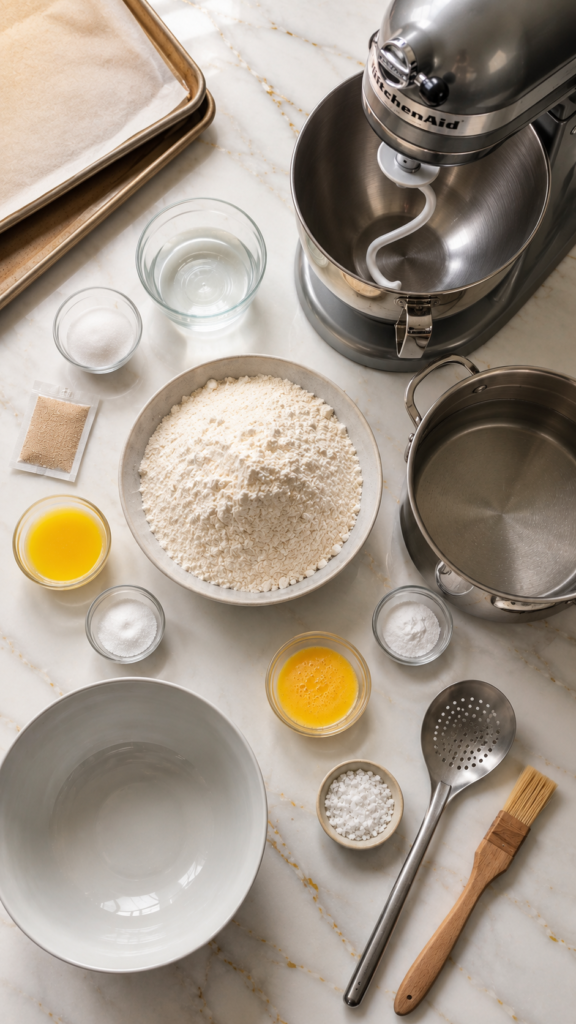
What You’ll Need
For the dough:
- 1 ½ cups warm water (about 110°F)
- 1 tablespoon sugar
- 2 ¼ teaspoons active dry yeast (1 packet)
- 4 ½ cups all-purpose flour
- 4 tablespoons unsalted butter, melted
- 2 teaspoons salt
For the baking soda bath:
- 10 cups water
- ⅔ cup baking soda
For topping:
- 1 large egg, beaten (this is your egg wash)
- Coarse pretzel salt or flaky sea salt
That’s genuinely it. No fancy flours, no mystery ingredients. Just pantry basics doing something kind of magical when you combine them.
Tools You’ll Need
- Large mixing bowl
- Stand mixer with a dough hook (or just your hands, works fine too)
- Large pot for the baking soda bath
- Slotted spoon or spider strainer
- Baking sheets
- Parchment paper
- Pastry brush
How to Make Soft Pretzels
1. Wake up the yeast.
Mix the warm water, sugar, and yeast in a bowl. Let it sit for 5 minutes.
You’ll know it’s ready when it looks foamy on top. If nothing happens, your yeast is dead and you’ll need a new packet.
2. Make the dough.
Add the flour, melted butter, and salt to the yeast mixture. Mix until a shaggy dough forms.
3. Knead it.
Knead for about 5 minutes, either by hand on a floured surface or with a stand mixer. You’re looking for a smooth, slightly tacky ball of dough.
4. Let it rise.
Place the dough in a lightly oiled bowl, cover it, and let it rise somewhere warm for 1 hour, or until it’s doubled in size.
5. Shape your pretzels.
Punch down the dough and divide it into 8 equal pieces.
Roll each piece into a rope about 24 inches long. Then form the classic pretzel shape: make a U, cross the ends over each other twice, then fold them down onto the bottom of the U.
6. Preheat and prep.
While your pretzels rest for 10 minutes, preheat your oven to 425°F and line two baking sheets with parchment paper.
7. The baking soda bath.
Bring the 10 cups of water to a boil, then stir in the baking soda carefully (it’ll fizz up).
Dunk each pretzel in the boiling water for about 30 seconds, then lift it out with your slotted spoon and place it on the baking sheet.
This step is the one people skip, and it’s the one that matters most. More on that below. 👇
8. Egg wash and salt.
Brush each pretzel with the beaten egg, then sprinkle generously with coarse salt.
9. Bake.
Bake for 12-15 minutes, until they’re a deep golden brown. Don’t pull them early just because they look done at 10 minutes. That last stretch is where the color really develops.
10. Cool slightly, then eat.
Let them sit for a few minutes before diving in. The inside is molten right out of the oven.
Pro Tips
Don’t skip the baking soda bath. This is the step that gives pretzels their signature chewy crust and deep brown color. Skip it, and you basically end up with bread rolls shaped like pretzels. Not the same thing at all.
Use a scale if you have one. Flour measurements can vary a lot depending on how you scoop it. If your dough feels too sticky after kneading, add flour a tablespoon at a time instead of dumping in a whole extra cup.
Warm water, not hot water. Water that’s too hot will kill your yeast before it even gets started. Aim for something that feels like a warm bath, roughly 110°F if you’re using a thermometer.
Salt them immediately after the egg wash. The salt needs something wet to stick to. Wait too long and it’ll just roll right off.
Work in batches for the boiling step. Crowding the pot cools the water down fast and makes the pretzels stick together. Give them room.
Substitutions and Variations
- Whole wheat: Swap up to half the all-purpose flour for whole wheat for a nuttier flavor and heartier bite.
- Sweet version: Skip the salt topping and brush with melted butter plus cinnamon sugar right after baking.
- Cheese-stuffed: Flatten your dough rope slightly, add a strip of mozzarella down the middle, and pinch it closed before shaping.
- No stand mixer: Hand kneading works great, it just takes a bit more elbow grease.
- Gluten-free: A 1:1 gluten-free flour blend can work, though the texture will be a little less chewy and more tender.
Make-Ahead Tips
You can make the dough up to a day ahead. Let it rise once, punch it down, then keep it covered in the fridge overnight.
When you’re ready to bake, let it come back to room temperature for about 30 minutes before shaping.
You can also shape the pretzels and freeze them before the baking soda bath. Freeze on a tray until solid, then transfer to a bag. When you’re ready to bake, boil and bake straight from frozen, just add a couple extra minutes in the oven.
Leftovers and Storage
Pretzels are best the day they’re made, but they’ll still be good for a couple days.
- Room temperature: Store in an airtight container for up to 2 days.
- Fridge: Up to 5 days, though the texture gets a bit denser.
- Freezer: Freeze baked and cooled pretzels for up to 3 months.
To reheat, pop them in a 350°F oven for about 5 minutes. This brings back that fresh-baked chew way better than the microwave, which tends to make them tough and rubbery.
A Few Extra Details
Nutrition (per pretzel, roughly): 220 calories, 5g protein, 42g carbs, 3g fat. This will shift depending on how much salt and butter you use.
Pairs well with: Beer cheese dip, honey mustard, or just a good spicy mustard. For a full spread, add soft pretzel bites and a cheese board.
Time-saving tip: Make the dough the night before (see Make-Ahead Tips above) so all you’re doing the day of is shaping, boiling, and baking. Cuts your active time down by more than half.
FAQ
Why do you boil pretzels in baking soda water? It raises the pH of the dough’s surface, which is what creates that dark, shiny, chewy crust pretzels are known for. Without it, they’d bake up pale and soft, more like a dinner roll.
Can I use instant yeast instead of active dry? Yes. Skip the proofing step and mix it straight into the flour. Your rise time might be slightly shorter.
Why is my pretzel dough too sticky to shape? It usually just needs a bit more flour. Add it a tablespoon at a time while kneading until it’s smooth and only slightly tacky.
Can I make these without a stand mixer? Absolutely. Hand kneading takes about 8-10 minutes instead of 5, but it works just as well.
Why did my pretzels turn out pale instead of dark brown? Either the baking soda bath was skipped, the water wasn’t hot enough, or the ratio of soda to water was too low. Stick with ⅔ cup baking soda per 10 cups of water for the best color.
Wrapping Up
Homemade soft pretzels are one of those recipes that feel a little fancy but are actually pretty forgiving once you get the hang of the shaping.
Give this one a try this weekend, maybe with a movie and a batch of mustard on the side. 🍺
Drop a comment below and let me know how yours turned out, or ask away if anything’s unclear. I read every single one.




