
I didn’t grow up eating bao. I grew up eating whatever came out of a box.
So the first time I bit into a warm, pillowy bun and found melted chocolate hiding inside, I actually stopped chewing for a second. Like, wait, buns can do this?
That’s chocolate bao. Soft steamed dough, stuffed with rich chocolate, and somehow lighter than anything with “chocolate” in the name has any right to be.
I’ve made these more times than I can count now, and I still get a little thrill watching that first bun get torn open. The chocolate stretches. Someone always says “oh my gosh” out loud. Every single time.
Here’s exactly how I make them at home, no steamer basket confusion, no dense hockey-puck buns. Just soft, fluffy, chocolate-stuffed happiness. 🥟
Recipe at a Glance
| Detail | Info |
|---|---|
| Prep time | 25 minutes (plus 1.5 hours rising) |
| Cook time | 12 minutes |
| Total time | About 2 hours |
| Yield | 12 bao |
| Difficulty | Beginner-friendly |
| Best for | Dessert, afternoon snack, showing off a little |
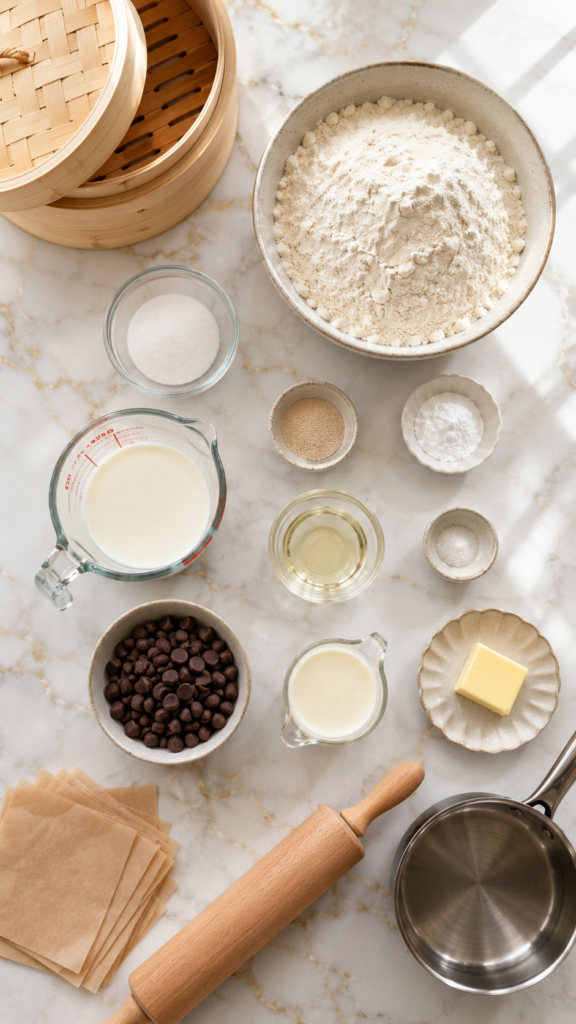
What You’ll Need
For the dough:
- 2 ½ cups all-purpose flour
- 2 tablespoons sugar
- 1 teaspoon instant yeast
- 1 teaspoon baking powder
- ¾ cup warm milk
- 2 tablespoons vegetable oil
- Pinch of salt
For the filling:
- 1 cup semisweet chocolate chips
- 2 tablespoons heavy cream
- 1 tablespoon butter
That’s it. Nine ingredients, most of them already in your kitchen.
Tools You’ll Need
- Steamer basket (bamboo or metal, either works)
- Parchment paper, cut into small squares
- Stand mixer or large mixing bowl
- Rolling pin
- Small saucepan
No steamer? A large pot with a heatproof plate and a lid works just fine. I’ve done it plenty of times when traveling.
How to Make Chocolate Bao
Step 1: Make the Dough
Warm your milk until it’s just above room temperature. Not hot, or you’ll kill the yeast.
Stir in the sugar and yeast, then let it sit for 5 minutes until it looks foamy on top.
In a mixing bowl, combine flour, baking powder, and salt. Pour in the yeast mixture and oil.
Mix until a shaggy dough forms, then knead for about 8 minutes until it’s smooth and a little tacky. Your hands will thank you if you use a stand mixer with a dough hook here.
Step 2: Let It Rise
Cover the bowl with a damp towel. Set it somewhere warm.
Let it rise for 1 to 1.5 hours, until it’s doubled in size. I usually use this time to make the filling and clean my kitchen, which somehow always looks like a flour bomb went off.
Step 3: Make the Filling
Melt the chocolate chips, cream, and butter together in a small saucepan over low heat.
Stir constantly until smooth and glossy. This takes maybe 3 minutes.
Pour it into a shallow dish and freeze for 20 to 30 minutes, until firm enough to scoop and roll into balls. This step matters more than it sounds like it should.
Step 4: Shape the Bao
Once the dough has risen, punch it down and divide it into 12 equal pieces.
Roll each piece into a ball, then flatten into a small disc, thicker in the middle and thinner at the edges.
Place a frozen chocolate ball in the center. Gather the edges up and around, pinching to seal completely.
Set each bun, seam-side down, on a small square of parchment paper.
Step 5: Second Rise
Let the shaped buns rest for 15 to 20 minutes. They’ll puff up slightly, which is exactly what you want.
Step 6: Steam
Arrange the buns in your steamer basket with space between them. They expand more than you’d think.
Steam over simmering water for 10 to 12 minutes. Do not lift the lid while steaming. I know it’s tempting. Resist.
Turn off the heat and let the buns sit, covered, for 2 minutes before removing the lid. This little pause keeps them from collapsing.
Pro Tips
- Don’t rush the freeze on the filling. A soft chocolate center will burst through the dough while steaming instead of staying put.
- Keep your steam gentle, not aggressive. A rolling boil can cause the buns to wrinkle or split on top.
- Never lift the lid mid-steam. Even a quick peek drops the temperature and can leave you with dense, sunken buns.
- Pinch the seams tightly. A loose seal means chocolate leaking into your steamer instead of staying inside the bun.
- Give the buns room to grow. Overcrowding causes them to stick together and steam unevenly.
Substitutions and Variations
- Milk chocolate instead of semisweet for a sweeter, kid-friendly filling.
- Nutella works beautifully and skips the melting step entirely.
- Dairy-free milk and chocolate to make these fully plant-based.
- Matcha powder whisked into the dough for a subtle color and flavor twist.
- Peanut butter and chocolate combo if you want something a little richer.
Make-Ahead Tips
You can shape the buns and freeze them uncooked, before the second rise.
When you’re ready, thaw them in the fridge overnight, then let them come to room temperature before steaming.
The chocolate filling also keeps in the freezer for up to a month, already rolled into balls. Future you will be thrilled.
Leftovers and Storage
Cooled bao keep in an airtight container in the fridge for up to 4 days.
To reheat, steam them again for 3 to 4 minutes, or microwave for 20 to 30 seconds wrapped in a damp paper towel.
For longer storage, freeze cooked bao for up to 2 months. Reheat straight from frozen by steaming for about 8 minutes.
FAQ
Why did my bao turn out dense instead of fluffy?
Usually it’s either old yeast or not enough rise time. Give the dough the full doubling time, even if it takes longer on a cold day.
Can I bake these instead of steaming?
Not quite the same result. Steaming is what gives bao that soft, slightly chewy texture. Baking will dry them out.
Why did the chocolate leak out during steaming?
The filling probably wasn’t frozen enough, or the seam wasn’t pinched tightly. Both are easy fixes next time around.
Can I make the dough by hand without a stand mixer?
Yes. It just takes a bit more elbow grease and a few extra minutes of kneading.
What’s the best way to know the dough has risen enough?
Press a finger into it. If the indent slowly springs back halfway, it’s ready.
Wrapping Up
Chocolate bao sounds fancy, but it’s honestly one of the more forgiving things you can make in your kitchen. Soft dough, a molten center, and a little patience while it steams.
Once you’ve made a batch, you’ll understand why I keep coming back to this recipe on random Tuesday nights.
Give it a try this week, then come back and tell me how it went. I’d love to hear what filling you used and whether anyone in your house made the same “oh my gosh” sound mine always does. 🍫




