
My freezer used to be full of the store-bought kind.
Then I made these once, and I haven’t bought a single box since.
They’re crispy on the outside, stuffed with melty cheese and pepperoni on the inside, and they take about 30 minutes from start to finish. 🍕
Kids love them. Adults sneak them at midnight. Nobody complains.
Here’s exactly how I make mine.
Recipe at a Glance
| Detail | Info |
|---|---|
| Prep time | 15 minutes |
| Cook time | 15 minutes |
| Total time | 30 minutes |
| Makes | 8 pockets |
| Difficulty | Easy |
| Best for | Weeknight dinners, lunchboxes, game day |
What You’ll Need
For the pockets:
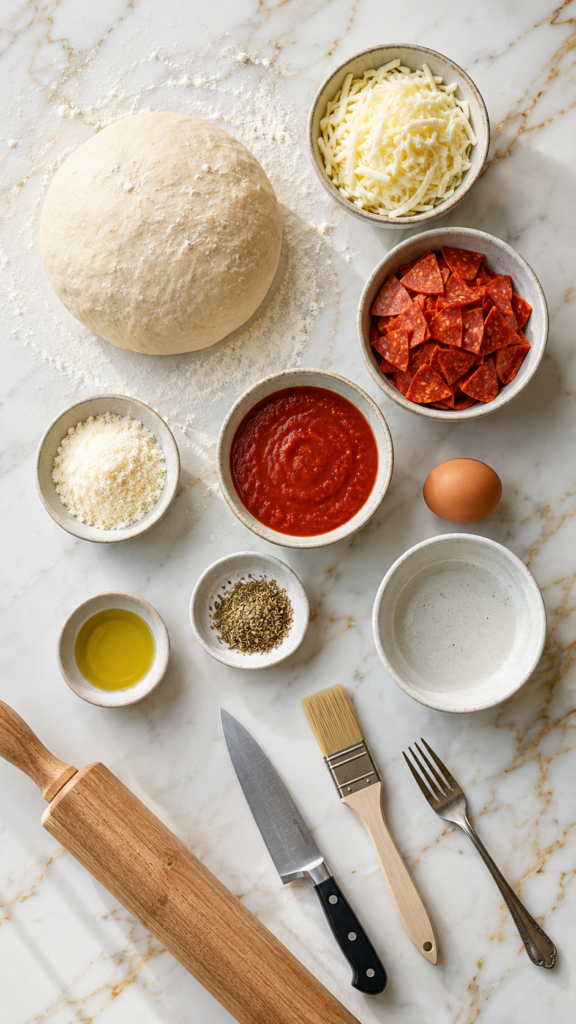
- 1 lb pizza dough (store-bought or homemade)
- 1 cup mozzarella cheese, shredded
- 1/2 cup pepperoni, chopped
- 1/2 cup pizza sauce, plus extra for dipping
- 1/4 cup parmesan cheese, grated
- 1 tsp Italian seasoning
- 1 egg (for egg wash)
- 1 tbsp olive oil
- Flour, for dusting
That’s it. Nothing fancy, nothing you can’t find at a regular grocery store.
Tools You’ll Need
- Rolling pin
- Sharp knife or pizza cutter
- Baking sheet
- Parchment paper
- Pastry brush
- Small mixing bowl
- Fork (for sealing edges)
How to Make Cheesy Pizza Pockets
Step 1: Prep the Dough
Dust your counter with flour.
Roll the pizza dough out into a large rectangle, about 1/4 inch thick.
Cut it into 8 equal squares. Don’t worry about perfection here — rustic is fine.
Step 2: Build Your Filling
In a small bowl, mix the mozzarella, pepperoni, parmesan, and Italian seasoning together.
Spoon about 2 tablespoons of pizza sauce onto one half of each dough square.
Top the sauce with a generous scoop of the cheese mixture.
Don’t overfill. I learned this one the hard way — too much filling means a blowout in the oven.
Step 3: Seal Them Up
Fold each square over into a triangle or rectangle, covering the filling.
Press the edges together with a fork to seal.
This is the step that keeps all that melty cheese where it belongs.
Step 4: Egg Wash and Bake
Whisk the egg with a splash of water.
Brush it over the top of each pocket. This gives you that golden, bakery-style shine.
Place the pockets on a parchment-lined baking sheet.
Bake at 400°F for 15 minutes, or until golden brown.
Step 5: Cool, Serve, Repeat
Let them sit for 5 minutes before biting in.
Trust me on this one. The cheese inside is basically lava for the first few minutes. 🔥
Serve with warm pizza sauce for dipping.
Pro Tips From My Kitchen
- Cold dough is easier to work with. If your dough is too soft to roll, pop it in the fridge for 10 minutes first.
- Seal with a fork, not just your fingers. A tight seal is the difference between a clean pocket and a cheese explosion on your baking sheet.
- Don’t skip the egg wash. It’s a 10-second step that makes these look like they came from a bakery, not a freezer.
- Let them rest before eating. The filling holds its shape better once it cools slightly, so you get a clean bite instead of a molten mess.
- Bake in a single layer with space between each pocket. Crowding the pan traps steam and makes the bottoms soggy instead of crisp.
Substitutions and Variations
Pizza pockets are basically a blank canvas. Here’s how to switch things up:
- Meat swap: Use cooked sausage, ham, or shredded chicken instead of pepperoni.
- Veggie version: Skip the meat and add sautéed mushrooms, bell peppers, or spinach.
- Cheese swap: Provolone or a Mexican cheese blend both work great.
- Spicy kick: Add a pinch of red pepper flakes to the filling.
- Dough alternative: Puff pastry or crescent roll dough both work if you’re out of pizza dough.
- Gluten-free: Use a gluten-free pizza dough — most store-bought versions roll out just fine.
Make-Ahead Tips
These freeze beautifully, which is honestly half the reason I make a double batch every time.
- To freeze before baking: Assemble the pockets, then freeze them on a baking sheet until solid. Transfer to a freezer bag. Bake straight from frozen, adding 5-7 extra minutes.
- To freeze after baking: Let them cool completely, then freeze in a single layer before bagging.
- Reheating: Oven or air fryer at 350°F for about 8 minutes brings back the crisp. Microwaving works too, but you’ll lose that crunchy shell.
Leftovers and Storage
- Fridge: Store in an airtight container for up to 4 days.
- Freezer: Up to 3 months.
- Reheating: Air fryer is the winner here. It crisps the outside back up without drying out the filling.
Skip the microwave if you can help it. It works, but the crust goes soft and a little sad.
FAQ
Can I use homemade pizza dough?
Yes, and it’s honestly even better. Just make sure it’s had time to rise before rolling it out.
Why did my pockets leak cheese while baking?
This usually means the seal wasn’t tight enough, or there was too much filling. A fork-crimped edge fixes most of this.
Can I make these ahead for a party?
Definitely. Assemble them the night before, keep them covered in the fridge, and bake right before guests arrive.
Are these good cold?
They’re fine cold, but they’re so much better warm. The cheese pull alone is worth reheating for.
Can I air fry instead of bake?
Yes. Air fry at 375°F for about 10-12 minutes, flipping halfway through.
Wrapping Up
These pockets are the kind of recipe that quietly becomes a staple.
They’re fast, they freeze well, and they disappear the second they hit the table.
Make a batch this week and see how long they actually last in your freezer. (Mine never make it past day two.)
Drop a comment below and let me know how yours turned out — or if you tried one of the filling variations, I want to hear about it. 🍕




