I burned the first batch of this. Badly.
The second batch? My husband asked for the recipe before he’d even finished his plate.
That’s the kind of dish this is. A little forgiving once you know the trick, and honestly kind of impossible to mess up twice.
This ricotta-stuffed chicken has become one of those meals I make when I want people to think I tried way harder than I actually did. Creamy, garlicky ricotta tucked inside a juicy chicken breast, a golden sear on the outside, and a few minutes in the oven to finish it off.
It looks fancy. It’s not. Let’s get into it.
Recipe at a Glance
| Detail | Info |
|---|---|
| Prep Time | 15 minutes |
| Cook Time | 25 minutes |
| Total Time | 40 minutes |
| Servings | 4 |
| Difficulty | Easy |
| Calories | ~410 per serving |
What You’ll Need
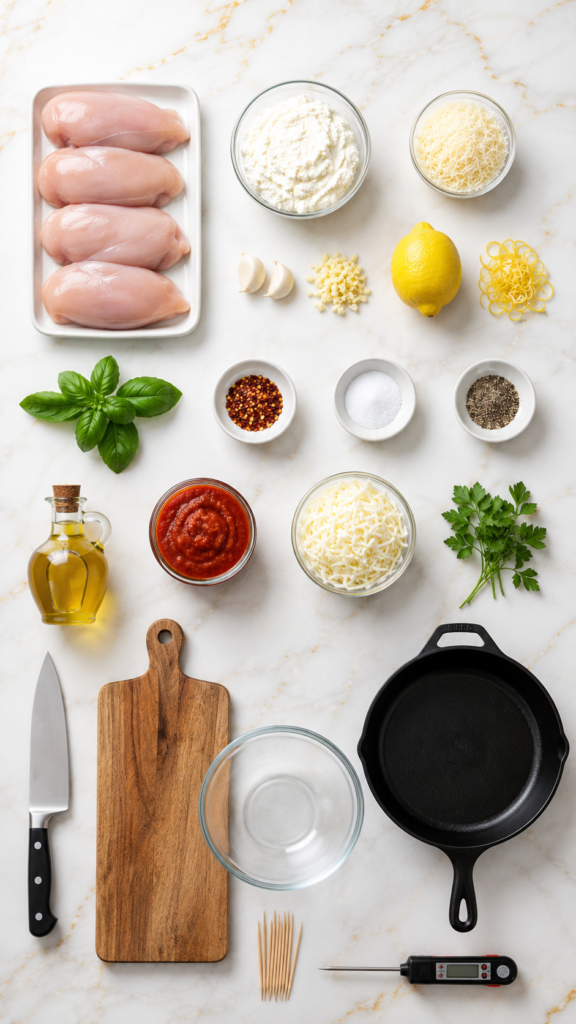
For the chicken:
- 4 boneless, skinless chicken breasts
- 2 tablespoons olive oil
- Salt and black pepper, to taste
For the ricotta filling:
- 1 cup whole milk ricotta cheese
- ½ cup grated parmesan cheese
- 2 cloves garlic, minced
- 1 teaspoon lemon zest
- 2 tablespoons fresh basil, chopped (or 1 teaspoon dried)
- ¼ teaspoon red pepper flakes (optional, but I always add it)
- Salt and pepper, to taste
For the finish:
- 1 cup marinara sauce
- 1 cup shredded mozzarella
- Fresh parsley or basil, for garnish
Tools You’ll Need
- Sharp knife
- Cutting board
- Mixing bowl
- Oven-safe skillet (cast iron works great)
- Toothpicks
- Meat thermometer
That last one isn’t optional in my book. Chicken is the one thing I never eyeball.
How to Make It
Step 1: Mix the filling
In a bowl, combine the ricotta, parmesan, garlic, lemon zest, basil, and red pepper flakes.
Season with salt and pepper. Stir until smooth.
Taste it. I know it’s raw cheese and garlic, but trust me, tasting it now saves you from bland stuffing later.
Step 2: Prep the chicken
Lay each chicken breast flat on your cutting board.
Using a sharp knife, slice a pocket into the thickest part of the breast. Don’t cut all the way through. You’re making a little pouch, not two halves.
Season the outside and inside of the pocket with salt and pepper.
Step 3: Stuff it
Spoon the ricotta mixture into each pocket. Don’t overstuff, or it’ll ooze out while cooking.
Secure the opening with a toothpick or two.
Step 4: Sear
Heat olive oil in an oven-safe skillet over medium-high heat.
Sear the chicken for 3 to 4 minutes per side, until golden brown. You’re not cooking it through yet, just building color and flavor.
Step 5: Bake
Spoon marinara sauce over and around the chicken. Top with shredded mozzarella.
Transfer the skillet to a 375°F oven and bake for 15 to 18 minutes, until the chicken hits 165°F internally and the cheese is bubbly.
Step 6: Rest, then serve
Let the chicken rest for 5 minutes before slicing.
This is the step everyone skips and shouldn’t. Cutting too early means all that filling runs straight onto the cutting board instead of staying inside where it belongs.
Garnish with fresh parsley or basil and serve.
Pro Tips
- Pound the thick end down first. Chicken breasts are uneven, and an even thickness means even cooking. A rolling pin works fine if you don’t have a meat mallet.
- Don’t skip the toothpicks. I tried once without them. The filling escaped into the pan, and I ended up with sad, empty chicken and a mess of melted cheese in my skillet.
- Let the ricotta sit at room temp for 10 minutes before mixing. Cold ricotta is stiff and hard to spread evenly. Room temp blends into a much creamier filling.
- Use a meat thermometer, always. 165°F is the number you want. Guessing leads to either dry, overcooked chicken or, worse, undercooked chicken.
- Reserve a little marinara for serving. Spooning extra sauce over the sliced chicken right before you plate it makes it look (and taste) like it came from a restaurant kitchen.
Substitutions and Variations
- No ricotta? Cottage cheese blended smooth works in a pinch.
- Dairy-free? Try a cashew-based ricotta alternative. The texture holds up surprisingly well.
- Want it spicier? Double the red pepper flakes or add a chopped jalapeño to the filling.
- No fresh basil? Swap in fresh spinach, sun-dried tomatoes, or roasted red peppers for a different flavor profile entirely.
- Low carb? Skip the marinara and top with a garlic cream sauce instead.
- Different protein? This same filling works beautifully stuffed into pork chops too.
Make-Ahead Tips
You can stuff the chicken breasts up to a day in advance. Just cover them tightly and keep them in the fridge until you’re ready to sear.
The ricotta filling on its own also keeps well for up to 3 days, so you can mix it ahead and stuff the chicken right before cooking.
I wouldn’t sear and bake it ahead of time, though. The chicken is best fresh out of the oven, when the cheese is still bubbly and the outside is still crisp.
Nutrition and Pairing Notes
Each serving comes in around 410 calories, with roughly 38 grams of protein. That’s a solid dinner if you’re trying to eat a little lighter without feeling like you’re missing out.
Good pairings:
- Roasted asparagus or broccolini
- A simple arugula salad with lemon vinaigrette
- Garlic bread, if you’re not worried about carbs
- A crisp glass of Pinot Grigio
For a faster weeknight version, stuff the chicken the night before. All you’ll have to do the next day is sear and bake, which cuts your active cooking time down to about 10 minutes.
Leftovers and Storage
Leftovers keep in an airtight container in the fridge for up to 3 days.
To reheat, I like the oven best. Cover with foil and warm at 350°F for about 10 minutes. The microwave works too, but the chicken can turn a little rubbery.
Freezing: You can freeze the stuffed, uncooked chicken for up to 2 months. Thaw overnight in the fridge before searing and baking as directed.
I don’t recommend freezing it after it’s fully cooked. The ricotta filling tends to separate and gets a little grainy once thawed.
FAQ
Can I use low-fat ricotta?
Yes, though the filling won’t be quite as rich or creamy. Whole milk ricotta gives you the best texture.
My filling keeps leaking out. What am I doing wrong?
Usually it’s one of two things: the pocket is cut too deep, or there aren’t enough toothpicks holding it closed. Two toothpicks per breast is usually the sweet spot.
Can I grill this instead of baking it?
You can, but stuffed chicken is trickier on a grill since the pocket can open up over direct heat. If you try it, use a lower, indirect heat and keep a close eye on it.
How do I know when the chicken is fully cooked?
Your meat thermometer should read 165°F when inserted into the thickest part of the meat, avoiding the filling itself.
Can I double this recipe for a crowd?
Absolutely. Just use a larger skillet or split it across two, and add a few extra minutes to the bake time if your pieces are packed tightly together.
Wrapping Up
This is one of those recipes that looks like it took way more effort than it actually did, and honestly, that’s exactly why I keep making it.
Give it a try this week and let me know how it turns out. Did you add anything different to the filling? Any tweaks that worked well for you?
Drop a comment below, I read every single one.




