You’ve had vanilla ice cream your whole life. And you’ve probably thought, “Yeah, it’s fine.”
Fine is about to leave the building.
Homemade vanilla ice cream made with real vanilla beans? It’s a completely different experience. The flavor is deeper, creamier, and way more complex than anything you’ve scooped from a cardboard tub.
And honestly? It’s not that hard to make. 👌
Recipe at a Glance
| Detail | Info |
|---|---|
| Prep Time | 20 minutes |
| Chill Time | 4 hours (or overnight) |
| Churn Time | 25-30 minutes |
| Total Time | ~5 hours (mostly hands-off) |
| Servings | 6-8 |
| Difficulty | Easy |
What You’ll Need
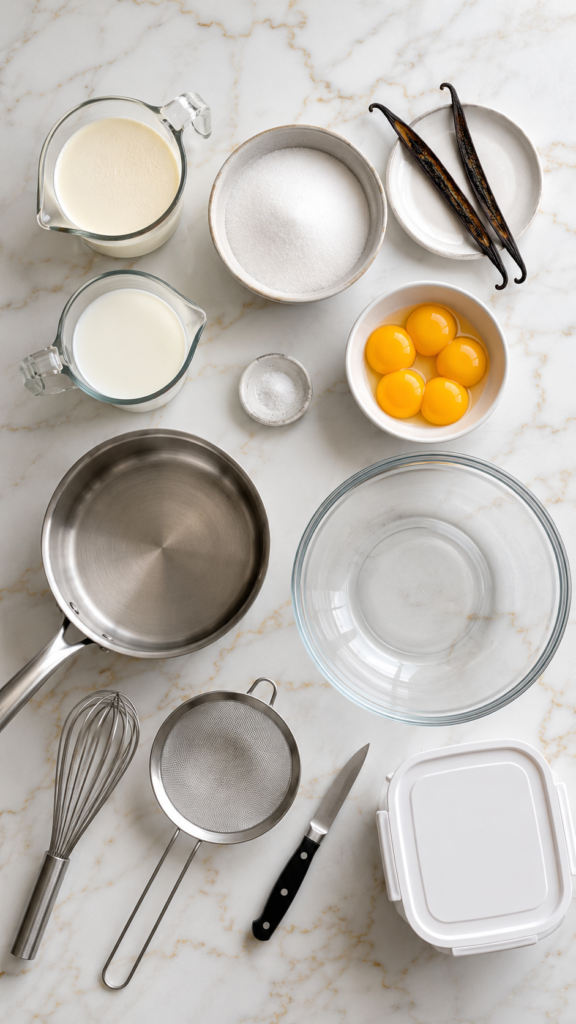
The Ingredients
- 2 cups heavy whipping cream (cold)
- 1 cup whole milk (cold)
- ¾ cup granulated white sugar
- 2 whole vanilla beans (or 2 tsp pure vanilla extract as a backup)
- 5 large egg yolks
- Pinch of salt
That’s it. Six ingredients. The kind of short list that makes you nervous at first, but trust it.
The magic is in the quality of those ingredients, not the quantity.
Tools You’ll Need
- Ice cream maker (with the bowl pre-frozen for at least 24 hours)
- Medium saucepan
- Large mixing bowl
- Whisk
- Fine mesh strainer
- Sharp paring knife (for splitting the vanilla bean)
- Plastic wrap or airtight freezer container
- Instant-read thermometer (optional but super helpful)
Pro Tips
These are the things that actually make a difference. Bookmark this section.
- Freeze your ice cream maker bowl the night before. If it’s not fully frozen, your ice cream won’t churn properly. A lot of first-timers skip this and wonder why they end up with soft soup. Don’t be that person.
- Use real vanilla beans if you can. The difference between pure vanilla bean and extract is genuinely surprising. You’ll see those gorgeous little black specks throughout your ice cream and the flavor is so much warmer and more layered.
- Temper your eggs slowly. This is the step people rush and then wonder why they ended up with scrambled egg bits in their custard. Add the hot cream mixture to the eggs one ladle at a time, whisking constantly. Patience here = silky smooth ice cream.
- Chill your custard completely before churning. A warm custard going into the machine = icy, grainy texture. Cold custard = creamy, dreamy perfection. Chill it for at least 4 hours, overnight if you can.
- Don’t skip the salt. It sounds counterintuitive in a dessert, but that pinch of salt balances the sweetness and rounds out the vanilla flavor in a way that’s hard to put into words.
Substitutions & Variations
Not everyone can or wants to make the exact same recipe, so here are some easy swaps:
- No ice cream maker? Pour the chilled custard into a shallow freezer-safe dish and freeze. Every 30 minutes for 3-4 hours, stir it vigorously with a fork to break up ice crystals. It won’t be as smooth, but it works.
- Dairy-free? Swap heavy cream and whole milk for full-fat coconut milk. Use two cans for a rich, tropical-vanilla twist.
- Lower sugar? Swap half the granulated sugar for a natural sweetener like maple syrup. Flavor will shift slightly but still delicious.
- Vanilla extract instead of beans? Totally fine, use 2 tsp of pure vanilla extract. Just add it after you remove the custard from the heat.
- Vegan? Use coconut milk and swap the egg yolks for 2 tbsp of cornstarch whisked into the milk before heating.
Fun Flavor Variations
Once you’ve nailed the base, try these spins:
- Honey Vanilla — replace ¼ cup of the sugar with good quality honey
- Brown Butter Vanilla — brown your butter first and stir 2 tbsp into the finished custard before chilling
- Vanilla Bean & Espresso — stir in 1 tsp of finely ground espresso powder before churning
Make-Ahead Tips
This recipe is perfect for making in advance. Here’s what to prep early:
- Custard base can be made up to 3 days ahead and stored covered in the fridge. Churn it fresh when you’re ready.
- Already churned ice cream keeps well in the freezer for up to 2 weeks if stored in an airtight container with plastic wrap pressed directly on the surface (this prevents ice crystals from forming on top).
- Vanilla bean sugar — after scraping your vanilla beans, drop the empty pods into a jar of sugar. In a week, you’ll have vanilla-infused sugar to use in everything. Genuinely life-changing. 🙌
How to Make Homemade Vanilla Ice Cream
Step 1: Split & Scrape the Vanilla Beans
Lay each vanilla bean flat on your cutting board. Use a sharp paring knife to slice them lengthwise, then use the back of the knife to scrape out all those tiny black seeds.
Add both the seeds and the empty pods to your saucepan. Don’t throw those pods away.
Step 2: Heat the Cream Mixture
Combine the heavy cream, whole milk, half the sugar (about 6 tbsp), and the vanilla beans + pods in your saucepan.
Heat over medium heat, stirring occasionally, until it just starts to steam and small bubbles form around the edges. Do not let it boil.
Remove from heat and let it steep for 20 minutes. This is where all that deep vanilla flavor gets pulled out.
Step 3: Whisk Egg Yolks & Sugar
In your large mixing bowl, whisk together the 5 egg yolks and remaining sugar until the mixture turns pale yellow and slightly thickened. About 2-3 minutes of whisking.
Step 4: Temper the Eggs
Here’s the step that separates silky custard from scrambled egg disaster.
Slowly pour the warm cream mixture into the egg yolk mixture, one ladle at a time, whisking constantly as you pour. Take your time here. Once you’ve added about half the cream mixture, you can pour the rest in more steadily.
Step 5: Cook the Custard
Pour everything back into the saucepan. Cook over medium-low heat, stirring constantly with a wooden spoon or silicone spatula, until the custard thickens enough to coat the back of a spoon.
If you have a thermometer, you’re aiming for 170-175°F (76-80°C). Do not let it go above 180°F or the eggs will scramble.
Step 6: Strain & Chill
Pour the custard through your fine mesh strainer into a clean bowl. This removes the vanilla pods and any tiny egg bits that may have cooked.
Stir in a pinch of salt.
Cover with plastic wrap, pressing it directly onto the surface of the custard, and refrigerate for at least 4 hours (overnight is ideal).
Step 7: Churn It
Pour the cold custard into your pre-frozen ice cream maker bowl and churn according to your machine’s instructions. Usually around 25-30 minutes.
The ice cream should look like thick, creamy soft-serve when it’s done.
Step 8: Freeze Until Set
Transfer to an airtight container. Press plastic wrap directly on the surface. Freeze for at least 2 more hours before serving.
Pull it from the freezer 5-10 minutes before scooping so it softens just enough.
Nutritional Breakdown (Per Serving)
| Nutrient | Amount |
|---|---|
| Calories | ~280 kcal |
| Total Fat | 21g |
| Saturated Fat | 13g |
| Carbohydrates | 20g |
| Sugar | 19g |
| Protein | 4g |
| Cholesterol | 185mg |
These are estimates and will vary based on exact ingredients used.
Meal Pairing Suggestions
This vanilla ice cream plays well with everything. Some favorites:
- Warm brownies or chocolate lava cake — the contrast of hot and cold is everything
- Fresh summer berries — strawberries, blueberries, raspberries, all of it
- Apple or peach crumble — honestly the perfect pairing
- A strong espresso poured directly over a scoop — affogato in under 60 seconds
- A thick slice of warm banana bread — underrated combo, try it
Leftovers & Storage
- Store in an airtight freezer container with plastic wrap pressed directly on the surface.
- Keeps for up to 2 weeks in the freezer.
- If it gets too hard, let it sit at room temperature for 5-10 minutes before scooping.
- Avoid putting it back in the freezer once it’s softened to room temperature. Refreeze only if it’s still mostly firm.
FAQ
Can I make this without an ice cream maker?
Yes! Pour the chilled custard into a shallow dish and freeze. Stir every 30 minutes for about 3-4 hours to break up the ice crystals. The texture will be a little icier but still very good.
Why are egg yolks in ice cream?
Egg yolks add fat and act as an emulsifier, which is what gives ice cream that super smooth, creamy texture that feels luxurious. It’s what separates a proper custard-based ice cream from a simple cream-and-sugar mix.
Can I use vanilla extract instead of vanilla beans?
Absolutely. Use 2 tsp of pure vanilla extract (not imitation). Add it after removing the custard from the heat. The flavor won’t be quite as deep but it’ll still be really good.
My ice cream came out icy instead of creamy. What happened?
Most likely one of two things: the custard wasn’t chilled enough before churning, or the ice cream maker bowl wasn’t frozen solid. Both lead to larger ice crystals forming, which creates that grainy texture.
How long does homemade ice cream last?
Up to 2 weeks in the freezer. After that, it starts to develop freezer burn and ice crystals.
Do I have to use whole milk?
For best results, yes. Lower fat milk means less creaminess. If you use 2% milk, the texture will be slightly less rich.
Can I double the recipe?
Yes, but check the capacity of your ice cream maker first. Most home machines max out around 1-1.5 quarts. If your doubled batch is too much, churn in two rounds.
Wrapping Up
There’s a moment when you take that first scoop of homemade vanilla ice cream — the one you made from scratch with actual vanilla beans and a custard you stirred with patience — and you taste it.
And you get it.
This is why people make ice cream at home. It’s the kind of thing you’ll want to make every summer weekend, the thing you’ll bring to gatherings that people ask you about, the thing that quietly becomes your signature.
Give it a try this week. And when you do, come back and drop a comment below. Tell me how it turned out, any tweaks you made, or any questions that came up along the way. I love hearing how it goes. 🍦