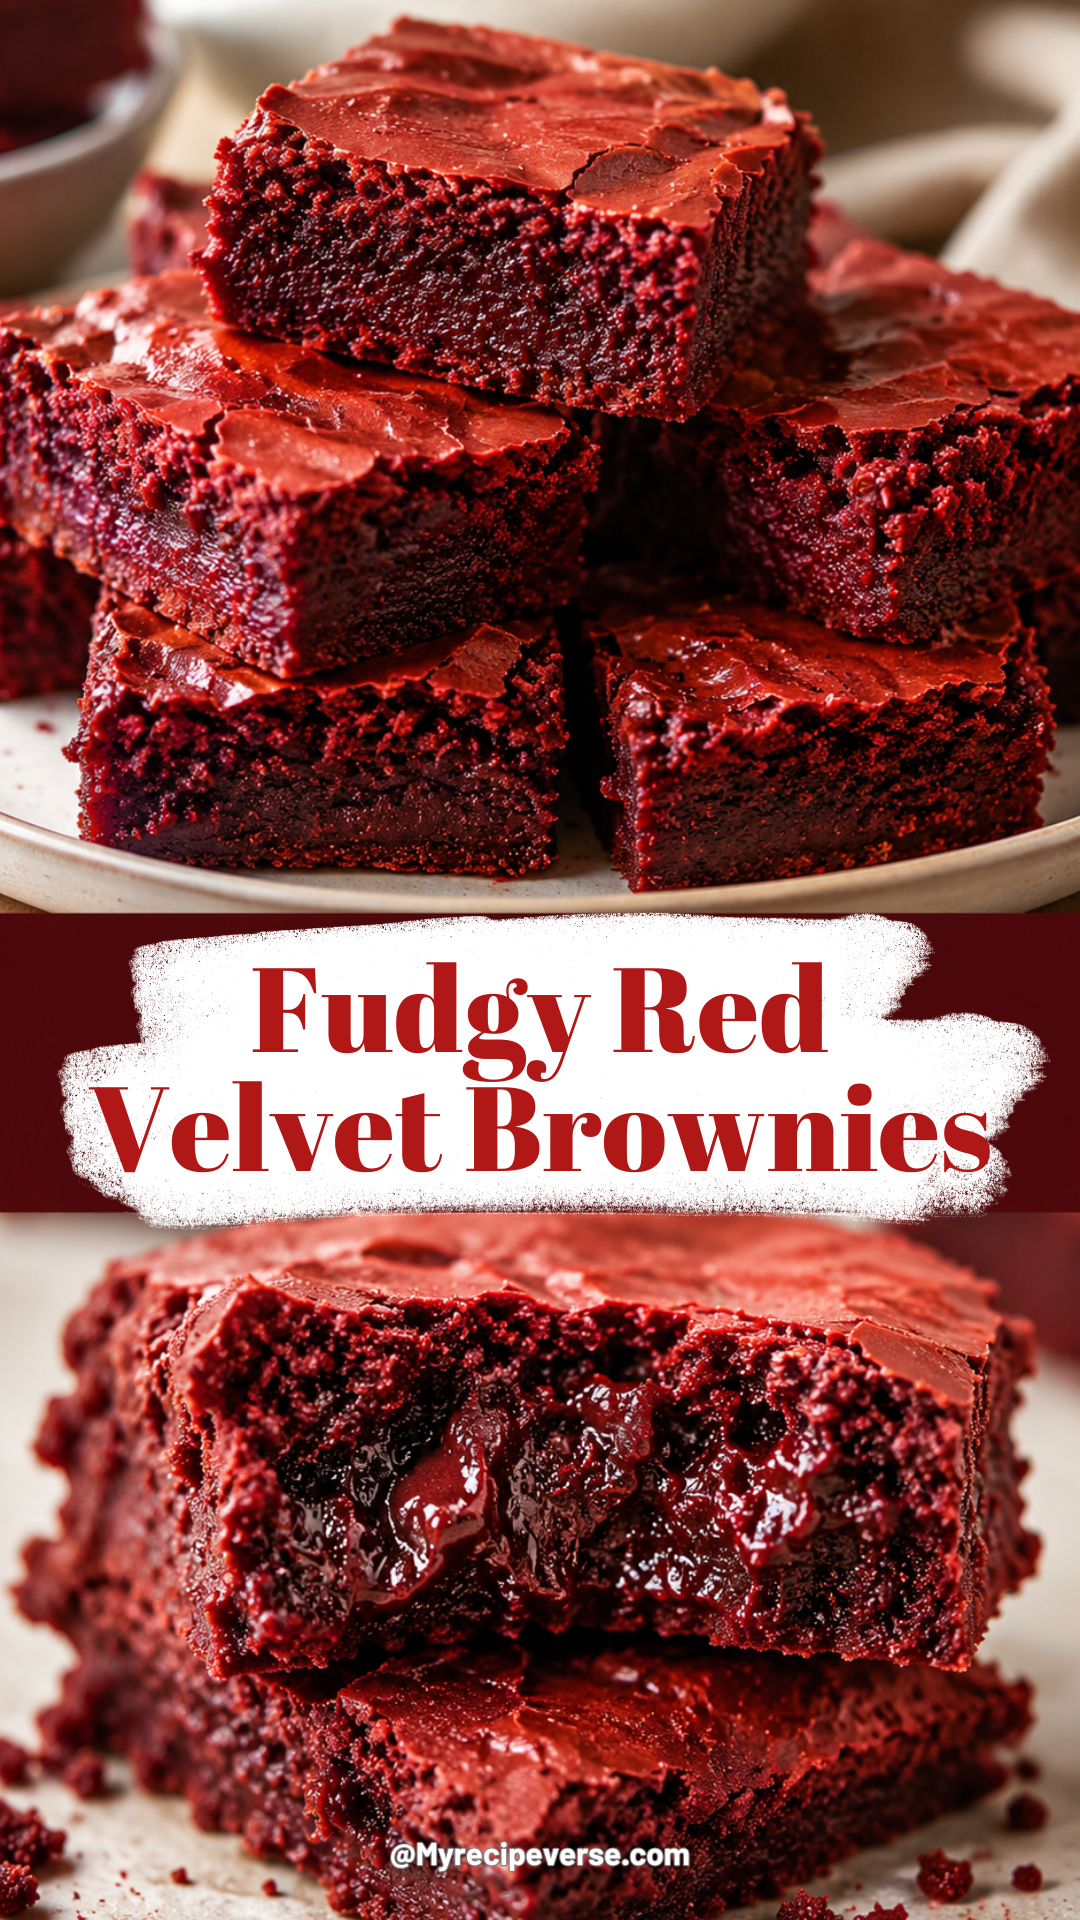
What if the fudgiest brownie you’ve ever had wasn’t chocolate at all?
I know, I know. Red velvet gets a bad reputation for being “just chocolate cake with food coloring.” But once you make these brownies, you’ll understand why that reputation is completely wrong.
These are dense, fudgy, slightly tangy, and have this gorgeous deep red color that makes them look way fancier than the 30 minutes of actual work they require. 😊
I’ve made these more times than I’d like to admit (mostly for “recipe testing” purposes, mostly not). And every single time, they disappear faster than anything else on the counter.
Let’s get into it.
Recipe At A Glance
| Detail | Info |
|---|---|
| Prep Time | 15 minutes |
| Bake Time | 28 to 32 minutes |
| Total Time | About 45 minutes |
| Yield | 16 brownies |
| Difficulty | Easy |
| Pan Size | 8×8 inch |
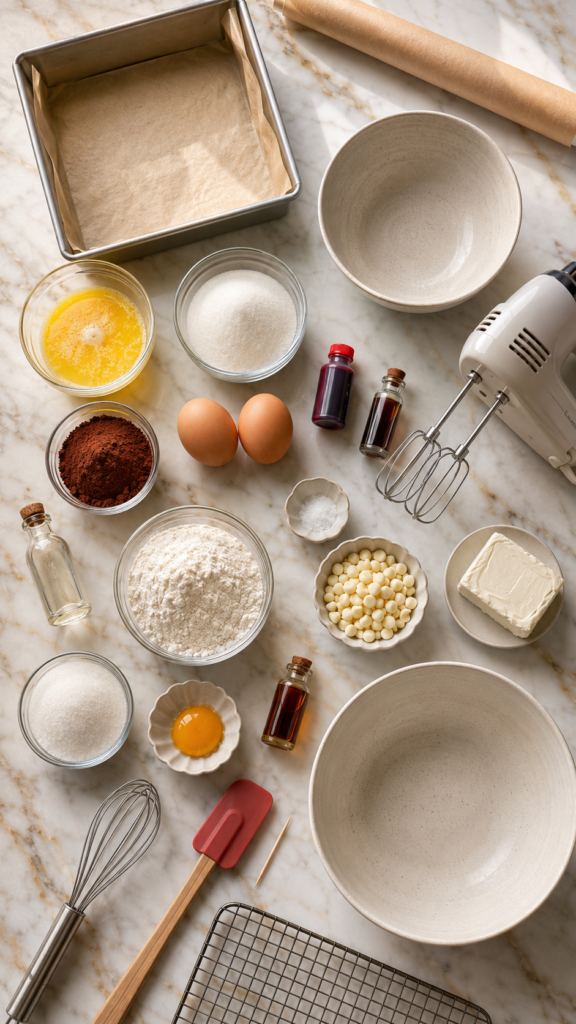
What You’ll Need
For the brownies:
- 1/2 cup (113g) unsalted butter, melted
- 1 cup (200g) granulated sugar
- 1/4 cup (25g) unsweetened cocoa powder
- 2 large eggs
- 2 teaspoons red gel food coloring
- 1 teaspoon vanilla extract
- 1 teaspoon white vinegar
- 3/4 cup (95g) all-purpose flour
- 1/4 teaspoon salt
- 1/2 cup (85g) white chocolate chips (optional, but highly recommended)
For the cream cheese swirl (optional, but so worth it):
- 4 oz cream cheese, softened
- 2 tablespoons granulated sugar
- 1 egg yolk
- 1/2 teaspoon vanilla extract
Tools You’ll Need
- 8×8 inch baking pan
- Parchment paper
- Two mixing bowls
- Whisk
- Rubber spatula
- Hand mixer (only needed for the cream cheese swirl)
- Toothpick, for testing doneness
- Cooling rack
How to Make Fudgy Red Velvet Brownies
Step 1: Prep your pan
Preheat your oven to 350°F (175°C).
Line your 8×8 pan with parchment paper, leaving a little overhang on two sides. This makes lifting the brownies out later so much easier.
Step 2: Mix the wet ingredients
In a large bowl, whisk together the melted butter and sugar until combined.
Add the eggs one at a time, whisking well after each one.
Whisk in the red food coloring, vanilla, and vinegar. Don’t skip the vinegar. It reacts with the cocoa powder and gives red velvet its signature tang.
Step 3: Add the dry ingredients
Sift in the cocoa powder, flour, and salt.
Fold everything together gently with a spatula. You want to mix just until no dry streaks remain.
Overmixing here is the #1 way to end up with cakey brownies instead of fudgy ones, so stop as soon as it’s combined.
Fold in the white chocolate chips, if using.
Step 4: Make the cream cheese swirl
In a separate bowl, beat the softened cream cheese, sugar, egg yolk, and vanilla together until smooth. This takes about a minute with a hand mixer.
Step 5: Layer and swirl
Pour the brownie batter into your prepared pan and spread it evenly.
Drop spoonfuls of the cream cheese mixture on top.
Take a knife or toothpick and swirl it through the batter in a figure-eight motion. Don’t overdo it. A few swirls is all you need for that marbled look.
Step 6: Bake
Bake for 28 to 32 minutes, or until the edges look set but the center still has a slight jiggle.
A toothpick inserted an inch from the center should come out with a few moist crumbs, not wet batter and not completely clean.
Step 7: Cool completely
This is the hardest step, but it’s non-negotiable.
Let the brownies cool in the pan for at least 2 hours before slicing. Fudgy brownies need this time to fully set, otherwise you’ll end up with a gooey mess instead of clean squares.
Pro Tips
- Use gel food coloring, not liquid. Liquid food coloring waters down your batter and gives you a dull, brownish red instead of that deep, vibrant color you’re after.
- Weigh your flour if you can. Too much flour is the difference between fudgy and cakey, and scooping straight from the bag almost always adds extra.
- Don’t skip the parchment paper. Fudgy brownies are sticky, and you’ll thank yourself later when they lift right out of the pan.
- Chill before slicing for the cleanest cuts. After the initial 2 hour cool, pop the pan in the fridge for 30 minutes. Your slices will look bakery perfect.
- Use a hot, clean knife between cuts. Run it under hot water and wipe it dry between every slice. It sounds fussy, but it makes a real difference.
Substitutions and Variations
- No cream cheese swirl? Skip it entirely. The brownies are still fudgy and delicious on their own.
- Dairy free? Swap the butter for a plant based butter and skip the cream cheese swirl, or use a dairy free cream cheese alternative.
- Gluten free? A 1:1 gluten free flour blend works well here. Just know the texture will be slightly denser.
- Want it extra chocolatey? Add 1/2 cup of dark chocolate chunks along with (or instead of) the white chocolate chips.
- No red food coloring on hand? You can leave it out completely. You’ll just get a chocolate brownie with a slight tang from the vinegar, which honestly still tastes incredible.
- Add a crunch factor. A handful of chopped pecans or walnuts folded into the batter adds a nice contrast to the fudgy texture.
Make-Ahead Tips
You can make the batter up to a day ahead and store it covered in the fridge. Just let it sit at room temperature for about 20 minutes before baking so it spreads evenly in the pan.
The baked brownies also freeze beautifully, which makes them a great one and done dessert for busy weeks.
Nutrition, Diet Swaps & Pairing Ideas
Approximate nutrition per brownie (based on 16 servings, with the cream cheese swirl):
| Nutrient | Amount |
|---|---|
| Calories | ~180 |
| Fat | 10g |
| Carbs | 21g |
| Sugar | 15g |
| Protein | 2g |
These numbers will shift depending on your exact ingredients, so treat them as a general guide.
Pairing ideas:
- A scoop of vanilla bean ice cream on top, warm brownie meeting cold ice cream is one of life’s great combos
- A glass of cold milk (this one’s a classic for a reason)
- A shot of espresso if you want to lean into the tang and richness
- Fresh raspberries on the side for a little tartness
Time saving tip: melt your butter in the microwave while your oven preheats, and you can realistically have this batter mixed and in the oven in under 10 minutes.
Leftovers and Storage
Counter: Store in an airtight container for up to 3 days. If you did the cream cheese swirl, I’d recommend the fridge instead.
Fridge: Up to 5 days in an airtight container. The cold actually makes them even fudgier.
Freezer: Wrap individual brownies tightly in plastic wrap, then place in a freezer safe bag. They’ll keep for up to 3 months.
To thaw, just let them sit at room temperature for about 20 minutes, or microwave for 10 to 15 seconds for that fresh from the oven feel.
FAQ
Why are my red velvet brownies more brown than red?
This usually comes down to the type of food coloring used. Liquid food coloring tends to bake out and turn brownish, while gel food coloring holds its color much better through baking.
Can I make these without cocoa powder?
Cocoa powder is what gives red velvet its subtle chocolate flavor, so I wouldn’t skip it. But you can reduce it slightly if you want a milder chocolate taste.
Why did my brownies turn out cakey instead of fudgy?
This is almost always from overmixing the batter or using too much flour. Fold gently and measure carefully for the fudgiest results.
Can I double this recipe?
Yes. Use a 9×13 pan and add about 5 to 8 extra minutes to the bake time. Just keep an eye on that toothpick test.
Do I have to use the cream cheese swirl?
Not at all. It adds a nice tangy contrast, but the brownies are fantastic without it too.
Can I use natural red food coloring instead of artificial?
Yes, though the color will likely be less vibrant. Beet powder is a popular natural alternative if you want to avoid artificial dyes.
Wrapping Up
These fudgy red velvet brownies hit that sweet spot between “special enough for a celebration” and “easy enough for a random Tuesday.”
The dense, fudgy texture combined with that subtle tang from the cream cheese swirl makes them completely different from your average brownie, and I think once you try them, they’ll become a regular in your baking rotation too.
Give this recipe a try, and when you do, leave a comment below and let me know how it turned out. I’d also love to hear if you tried any of the variations or if you have questions before you get started. I read every comment and I’m always happy to help troubleshoot!