You know those recipes that completely change your standards? This is one of them.
Buffalo mac and cheese takes the comfort food you’ve loved since childhood and cranks it up with bold, tangy buffalo heat and a creamy, pull-apart cheese sauce that coats every single noodle.
It’s rich. It’s spicy. It’s the kind of dinner that makes people ask for the recipe before they’ve even finished their bowl.
And honestly? It comes together in under 45 minutes. 🙌
Recipe at a Glance
| Detail | Info |
|---|---|
| Prep Time | 15 minutes |
| Cook Time | 25–30 minutes |
| Total Time | ~45 minutes |
| Servings | 6 |
| Difficulty | Easy |
| Best For | Weeknight dinners, game day, potlucks |
Why This Recipe Hits Different
Most buffalo mac and cheese recipes are either too spicy to actually enjoy, or so mild that the buffalo flavor barely registers.
This version nails the balance.
The secret? A roux-based cheese sauce (instead of just melting cheese into cream) gives you that thick, restaurant-quality coating that doesn’t get greasy or gummy as it sits.
And mixing sharp cheddar with cream cheese? Total game changer for texture.
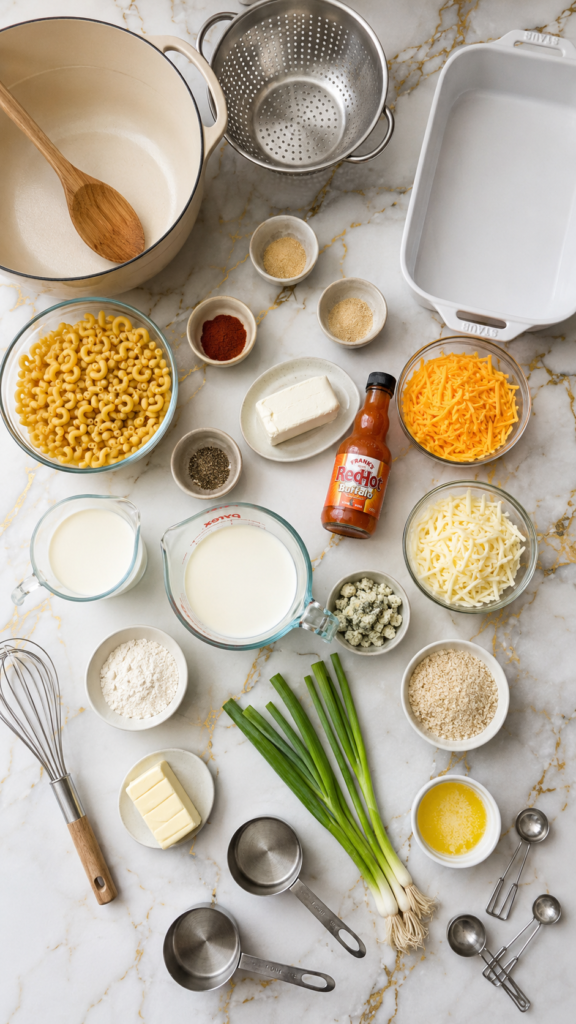
What You’ll Need
For the Pasta
- 1 lb (450g) elbow macaroni (or cavatappi for extra sauce-holding power)
- 1 tbsp salt (for pasta water)
For the Cheese Sauce
- 4 tbsp unsalted butter
- 3 tbsp all-purpose flour
- 2 cups whole milk, warmed
- 1 cup heavy cream
- 2 cups sharp cheddar cheese, freshly shredded
- 1 cup Monterey Jack cheese, freshly shredded
- 4 oz cream cheese, softened and cubed
- ½ cup buffalo sauce (Frank’s RedHot is the classic choice)
- 1 tsp garlic powder
- 1 tsp onion powder
- ½ tsp smoked paprika
- ½ tsp black pepper
- ½ tsp salt (adjust to taste)
For the Topping (Optional but Highly Recommended)
- ½ cup panko breadcrumbs
- 2 tbsp unsalted butter, melted
- ¼ cup sharp cheddar, shredded
- 2 tbsp buffalo sauce (for drizzling)
For Garnish
- ¼ cup crumbled blue cheese (or ranch dressing if blue cheese isn’t your thing)
- 2–3 green onions, thinly sliced
- Extra buffalo sauce for drizzling
Tools You’ll Need
- Large pot (for boiling pasta)
- Large deep skillet or Dutch oven
- Whisk
- Wooden spoon or silicone spatula
- Cheese grater (pre-shredded cheese won’t melt as smoothly)
- Measuring cups and spoons
- Colander
- 9×13 baking dish (if you’re doing the baked version with the topping)
- Oven-safe baking dish
Pro Tips
These are the things I wish someone had told me the first time I made this.
1. Shred your own cheese. Pre-shredded cheese has an anti-caking coating that makes it clump and not melt properly. It takes an extra three minutes, and it’s completely worth it.
2. Warm your milk before adding it. Cold milk hits a hot roux and creates lumps. Warm it in the microwave for about 60–90 seconds first, and your sauce will be silky smooth every single time.
3. Don’t overcook the pasta. Pull the macaroni out when it’s still slightly underdone (about 1–2 minutes before the package says). It’ll finish cooking in the sauce and won’t turn mushy.
4. Taste the buffalo sauce before committing. Buffalo sauces vary wildly in heat level. Start with ¼ cup, taste the sauce, and add more from there. You can always add more heat, but you can’t take it away.
5. Low and slow for the sauce. Once you add the cheese, keep the heat on medium-low. High heat breaks the sauce and makes it oily and grainy. Patience here makes all the difference.
Substitutions and Variations
No need to follow this recipe to the letter. Here’s how to make it work for you:
Cheese swaps:
- Gruyère instead of Monterey Jack for a nuttier, more complex flavor
- Pepper Jack for extra heat built right into the sauce
- Velveeta (½ cup) added alongside the other cheeses for an ultra-creamy, diner-style sauce
Pasta swaps:
- Cavatappi, shells, or rigatoni all hold sauce beautifully
- Gluten-free pasta works — just watch the cook time carefully
Buffalo sauce swaps:
- Homemade buffalo sauce: combine ¼ cup hot sauce + 2 tbsp melted butter + 1 tsp vinegar + pinch of garlic powder
- Mild buffalo sauce for lower heat
- Honey buffalo for a sweet-heat balance that’s really good
Add-ins:
- Shredded rotisserie chicken stirred in at the end (makes it a full meal)
- Crispy bacon crumbled on top
- Sautéed celery and onion for a full buffalo wing flavor profile
Dairy-free version:
- Swap butter for vegan butter
- Use oat milk or full-fat coconut milk in place of dairy milk and cream
- Vegan cheddar (Violife or Miyoko’s shreds well)
Make-Ahead Tips
Sauce only: Make the cheese sauce up to 2 days ahead and store it in an airtight container in the fridge. Reheat gently on the stove with a splash of milk, then toss with freshly cooked pasta.
Full dish (unbaked): Assemble everything in the baking dish, cover tightly with foil, and refrigerate for up to 24 hours. Add the breadcrumb topping right before baking. You may need to add 5–10 minutes to the bake time since it’s going in cold.
Freezer-friendly: Freeze the assembled (unbaked) dish for up to 2 months. Thaw overnight in the fridge before baking.
Nutritional Breakdown (Per Serving, Approximate)
| Nutrient | Amount |
|---|---|
| Calories | ~620 kcal |
| Protein | 24g |
| Carbohydrates | 52g |
| Fat | 36g |
| Saturated Fat | 21g |
| Sodium | 980mg |
| Fiber | 2g |
Note: These values are estimates based on standard ingredients. Toppings and add-ins will change the numbers.
Want to lighten it up?
- Use 2% milk instead of whole milk and cream
- Skip the heavy cream and replace it with more milk
- Use reduced-fat cheddar (though the sauce will be slightly less creamy)
Meal Pairing Suggestions
Buffalo mac and cheese is a full meal on its own, but if you want to round out the plate:
- A simple green salad with buttermilk ranch dressing cuts through the richness perfectly
- Celery and carrot sticks on the side (very buffalo wing of you, and it works)
- Coleslaw adds crunch and a cool contrast to the heat
- Garlic bread for when you want to go all in
How to Make Buffalo Mac and Cheese
Step 1: Cook the Pasta
Bring a large pot of heavily salted water to a boil. Add the macaroni and cook until just shy of al dente, about 1–2 minutes less than the package directions say.
Drain and set aside. Don’t rinse it — the starch on the pasta helps the sauce cling.
Step 2: Make the Roux
In a large deep skillet or Dutch oven, melt the butter over medium heat. Once it’s melted and starting to bubble slightly, whisk in the flour.
Cook the roux for about 1–2 minutes, whisking constantly. It should smell slightly nutty and look pale golden. This step cooks out the raw flour taste.
Step 3: Build the Sauce
Slowly pour in the warm milk, whisking constantly to prevent lumps. Then add the heavy cream.
Keep whisking over medium heat until the mixture thickens and coats the back of a spoon, about 5–7 minutes.
Step 4: Add the Cheese and Buffalo Sauce
Reduce the heat to medium-low. Add the cubed cream cheese first and stir until fully melted.
Then add the shredded cheddar and Monterey Jack in three batches, stirring after each addition until fully melted before adding more.
Pour in the buffalo sauce, garlic powder, onion powder, smoked paprika, salt, and pepper. Stir until combined. Taste and adjust the buffalo sauce to your heat preference.
Step 5: Combine
Add the drained pasta to the cheese sauce and stir until every noodle is coated.
If eating as a stovetop mac: Serve immediately with garnishes. Done.
If baking: Preheat the oven to 375°F (190°C). Pour the mac and cheese into a greased 9×13 baking dish.
Step 6: Make the Topping (For Baked Version)
Toss panko breadcrumbs with melted butter and ¼ cup shredded cheddar. Spread evenly over the top of the mac and cheese.
Drizzle with 2 tablespoons of buffalo sauce.
Bake uncovered for 20–25 minutes until the topping is golden and the edges are bubbling.
Step 7: Garnish and Serve
Top with crumbled blue cheese, sliced green onions, and a drizzle of extra buffalo sauce. Serve immediately.
Leftovers and Storage
Fridge: Store in an airtight container for up to 4 days. The sauce thickens significantly when cold.
Reheating: Add a splash of milk (2–3 tablespoons per serving) before reheating. Warm on the stove over medium-low heat, stirring frequently. Microwave works too — just do it in 60-second intervals, stirring in between, and add that splash of milk.
Freezer: Freeze in individual portions for up to 2 months. Thaw overnight in the fridge before reheating. The texture is slightly different after freezing (a little grainier), but still delicious.
Avoid adding the breadcrumb topping if you plan to freeze — it’ll go soggy. Add it fresh when you reheat.
FAQ
Can I make this without baking it?
Yes. The stovetop version is actually creamier and comes together faster. Skip the baking step entirely and serve straight from the pot. The baked version gives you the crispy topping, but it’s 100% optional.
How spicy is this?
With ½ cup of Frank’s RedHot, it’s a medium heat — noticeable warmth, but not overwhelming. Start with ¼ cup if you’re sensitive to spice, or go up to ¾ cup if you want a real kick.
Can I use pre-shredded cheese?
You can, but the sauce won’t be as smooth. Pre-shredded cheese has a powdery coating that prevents it from melting cleanly. If it’s all you have, it’ll still work — just lower the heat when melting.
My sauce turned out grainy. What happened?
This usually means the heat was too high when you added the cheese, or you added the cheese all at once. Always melt cheese over medium-low heat and add it gradually.
Can I add chicken?
Absolutely. Shredded rotisserie chicken stirred in at the end is a really easy way to turn this into a complete dinner. About 2 cups of shredded chicken works well for this recipe.
What’s the best buffalo sauce to use?
Frank’s RedHot Original is the classic and works perfectly. Crystal Hot Sauce is another solid choice. Avoid overly sweet or very thick buffalo sauces — they can make the cheese sauce too heavy.
Can I double the recipe?
Yes. Use a very large pot for the sauce (a Dutch oven works best) and a larger baking dish if you’re doing the baked version. Cooking time stays roughly the same.
Wrapping Up
This buffalo mac and cheese is the kind of recipe that earns a permanent spot in your dinner rotation. It’s unapologetically comforting, has just the right amount of heat, and looks impressive even though it genuinely isn’t that hard to make.
The first time you pull it out of the oven with that golden, crispy topping and the smell of buffalo sauce filling the kitchen… you’ll get it.
Give it a try this week and drop a comment below telling me how it went. Did you go stovetop or baked? Did you add chicken? Did you tweak the spice level?
I’d love to hear what worked for you.