You’ve had apple pie before. But have you had this apple pie?
There’s a reason this recipe keeps showing up on people’s “I made it three weekends in a row” lists. The filling is perfectly spiced, not overwhelmingly sweet, and the crust? Flaky, buttery, golden. It’s the kind of pie that makes your whole kitchen smell like a dream.
And here’s the thing — it’s easier than you think.
Recipe at a Glance
| Detail | Info |
|---|---|
| Prep Time | 45 minutes |
| Chill Time | 1 hour |
| Bake Time | 55–65 minutes |
| Total Time | ~2.5 hours |
| Servings | 8 slices |
| Difficulty | Beginner-friendly |
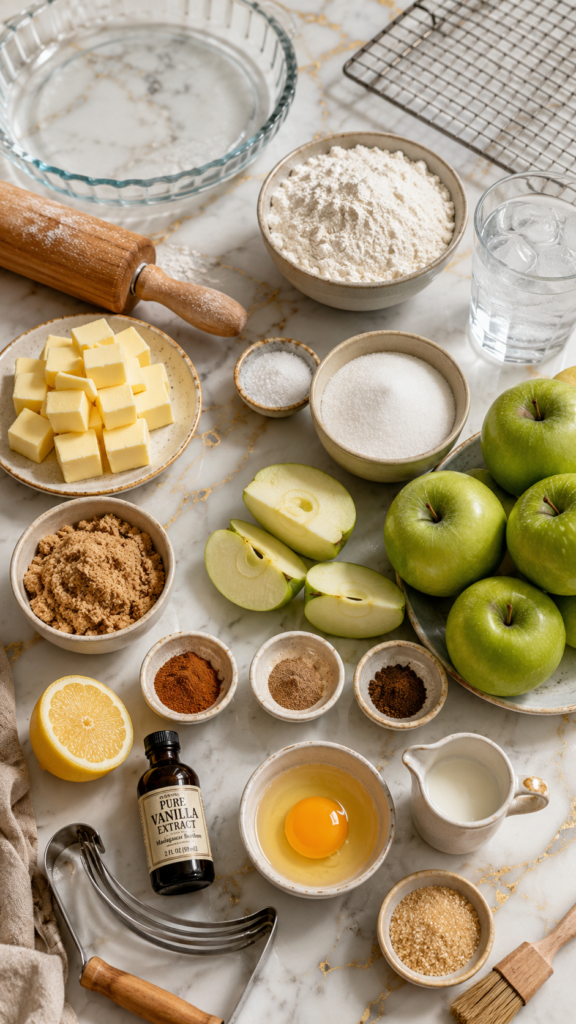
What You’ll Need
For the Pie Crust (makes a double crust)
- 2 ½ cups all-purpose flour
- 1 tsp salt
- 1 tbsp granulated sugar
- 1 cup (2 sticks) unsalted butter, very cold, cut into small cubes
- 6–8 tbsp ice water
For the Apple Filling
- 6–7 medium apples (about 3 lbs) — Granny Smith or a mix works great
- ¾ cup granulated sugar
- ¼ cup light brown sugar, packed
- 3 tbsp all-purpose flour
- 1 ½ tsp ground cinnamon
- ¼ tsp ground nutmeg
- ¼ tsp ground allspice
- 1 tbsp fresh lemon juice
- 1 tsp pure vanilla extract
- 2 tbsp unsalted butter, cut into small pieces
For the Egg Wash
- 1 large egg
- 1 tbsp milk
- 1 tbsp coarse sugar (for sprinkling, optional but worth it)
Tools You’ll Need
- 9-inch pie dish (glass or ceramic works best)
- Large mixing bowl
- Pastry cutter or food processor
- Rolling pin
- Sharp knife or apple peeler/corer
- Measuring cups and spoons
- Pastry brush
- Aluminum foil (for crust protection)
- Wire cooling rack
Pro Tips
A few things that make a real difference, especially the first time around.
1. Cold butter is non-negotiable. The colder your butter, the flakier your crust. If your kitchen runs warm, pop the cubed butter in the freezer for 15 minutes before using it. Cold = flaky. That’s the deal.
2. Don’t skip the chill time. After making the dough, wrapping it and letting it rest in the fridge for at least an hour keeps the gluten relaxed and the butter solid. Rolling out cold dough = way easier to handle.
3. Mix your apples. Granny Smith alone gives you tart and firm — great. But adding one or two Honeycrisp or Braeburn apples into the mix gives you a deeper, more complex flavor. Totally optional, but worth it.
4. Drain your filling before adding it. After mixing the apples with sugar, they’ll release a ton of liquid. Let them sit in a colander for 10–15 minutes and drain that liquid off. This keeps your bottom crust from getting soggy. 🙌
5. Protect your crust edges. The edges brown faster than the center. Cover them with a strip of foil (or a pie shield) after the first 25 minutes of baking so they don’t burn before the filling is fully cooked.
Substitutions and Variations
Gluten-free? Swap the all-purpose flour in the crust and filling for a 1:1 gluten-free flour blend. Bob’s Red Mill works really well here.
Dairy-free? Use a plant-based butter (like Miyoko’s or Earth Balance) for the crust. It works surprisingly well.
Less sugar? You can reduce the granulated sugar in the filling down to ½ cup if you’re using naturally sweet apples or just prefer a more tart pie.
Spice swap: Not a nutmeg fan? Leave it out. Want more warmth? Add a pinch of ground cloves.
Crumb topping version: Skip the top crust entirely and make a brown sugar oat crumble instead. Mix ¾ cup oats, ½ cup flour, ½ cup brown sugar, and 6 tbsp cold butter until crumbly. Pile it on top and bake as usual.
Mini hand pies: Use the same dough and filling to make individual hand pies. They bake faster (about 25–30 minutes at 375°F) and are great for parties or gifting.
Make-Ahead Tips
Apple pie is one of those recipes that’s actually better when you plan ahead.
- Pie dough: Make the crust up to 3 days ahead and store it in the fridge (wrapped tightly), or freeze it for up to 3 months.
- Apple filling: You can prep the filling the night before and store it covered in the fridge. Just drain any extra liquid before assembling.
- The full pie: Bake it a day ahead and keep it at room temperature, loosely covered. The flavors actually settle beautifully overnight.
How to Make Apple Pie
Step 1: Make the Pie Crust
In a large bowl, whisk together the flour, salt, and sugar.
Add the cold butter cubes and use a pastry cutter (or your fingertips) to work the butter into the flour until it looks like rough, pea-sized crumbles. You want visible chunks of butter — those are what create the flaky layers.
Add ice water one tablespoon at a time, mixing gently with a fork after each addition. Stop as soon as the dough starts to come together. It shouldn’t be wet or sticky — just barely holding.
Divide the dough in half, shape each half into a flat disk, wrap in plastic wrap, and refrigerate for at least 1 hour.
Step 2: Prep the Apple Filling
Peel, core, and slice your apples into ¼-inch slices. Consistent thickness matters — too thick and they won’t cook through, too thin and they turn to mush.
In a large bowl, toss the apple slices with both sugars, flour, cinnamon, nutmeg, allspice, lemon juice, and vanilla. Give it a good mix.
Let the filling sit for 10–15 minutes, then drain off any excess liquid. (Don’t skip this part.)
Step 3: Assemble the Pie
Preheat your oven to 425°F (220°C).
On a lightly floured surface, roll out one disk of dough into a 12-inch circle. Carefully transfer it to your 9-inch pie dish and gently press it into the bottom and sides. Let any excess hang over the edges for now.
Pour in the apple filling and spread it evenly. Dot the top with the 2 tbsp of butter pieces.
Roll out the second disk of dough. Lay it over the filling, then trim and crimp the edges together to seal. Cut a few slits in the top crust for steam to escape.
Brush the whole top with the egg wash and sprinkle with coarse sugar if using.
Step 4: Bake
Place the pie on a baking sheet (this catches drips — trust me on this one).
Bake at 425°F for 20 minutes, then reduce the temperature to 375°F (190°C) and bake for another 35–45 minutes, until the crust is deep golden brown and the filling is bubbling through the slits.
If the edges start browning too quickly, cover them with foil after the first 25 minutes.
Step 5: Cool Before Cutting
This part is genuinely hard.
Let the pie cool on a wire rack for at least 2–3 hours before slicing. If you cut it hot, the filling will be liquid-y. I know. I know. But the wait is worth it.
Nutritional Breakdown (Per Slice, ~⅛ of pie)
| Nutrient | Amount |
|---|---|
| Calories | ~420 kcal |
| Total Fat | 20g |
| Saturated Fat | 12g |
| Carbohydrates | 58g |
| Sugar | 30g |
| Fiber | 3g |
| Protein | 4g |
These are estimates and will vary slightly based on apple variety and exact ingredients used.
Meal Pairing Suggestions
Apple pie is great on its own, but here’s how to take it further:
- Classic: A scoop of good vanilla ice cream, slightly melted over the warm pie
- Elevated: A dollop of whipped cream with a tiny pinch of cinnamon on top
- Cheesy: A thin slice of sharp cheddar on the side (it’s a New England thing and it works)
- Cozy beverage pairing: Hot apple cider, spiced tea, or a warm chai latte
Leftovers and Storage
Room temperature: Loosely cover and store at room temp for up to 2 days.
Refrigerator: Cover tightly and refrigerate for up to 5 days. Warm individual slices in the microwave for 30–45 seconds or in a 300°F oven for about 10 minutes.
Freezer: You can freeze the whole baked pie or individual slices. Wrap well in plastic wrap and then foil. Freeze for up to 3 months. Thaw overnight in the fridge, then warm in a 350°F oven until heated through.
Unbaked pie: You can also freeze the assembled, unbaked pie. Bake straight from frozen at 425°F for 20 minutes, then 375°F for another 55–65 minutes.
FAQ
What are the best apples for apple pie?
Granny Smith is the classic choice — they hold their shape and have a nice tartness. For a more complex flavor, mix in a Honeycrisp, Braeburn, or Pink Lady.
Can I use store-bought pie crust?
Absolutely. Pillsbury refrigerated pie crusts work in a pinch and produce a really decent result. Homemade is better, but don’t let that stop you.
Why did my pie filling turn out runny?
Most likely, the apples released too much liquid and it wasn’t drained before baking. This can also happen if the pie wasn’t cooled long enough before cutting. Both of these steps really do make a difference.
Can I make this ahead for Thanksgiving or a party?
Yes! Bake it the day before and keep it at room temp, loosely covered. If you want to serve it warm, pop the whole pie in a 300°F oven for 15–20 minutes before serving.
My crust keeps cracking when I roll it out — what am I doing wrong?
The dough is probably too cold or too dry. Let it sit at room temp for 5 minutes before rolling, and if it’s cracking, add a tiny splash more water next time you make the dough.
Do I have to use egg wash?
No, but it gives the crust that gorgeous golden shine. You can also brush with just milk or cream if you don’t want to use a whole egg.
Wrapping Up
Apple pie really is one of those recipes that sounds more intimidating than it actually is.
Once you make it from scratch, you’ll realize how much better it is than anything pre-made. The flaky homemade crust, the perfectly spiced apples, that golden top with a little crunch from the coarse sugar — it’s a genuinely special thing to pull out of the oven.
Make it this weekend. Make it for someone you love. Or just make it for yourself and enjoy every single slice with zero guilt.
Then come back and tell me how it went in the comments below. Did you mix your apple varieties? Try a crumb topping? I want to hear everything. And if you have any questions at all, drop them below and I’ll get back to you! 🍎